Record Roblox Mobile Gameplay on iOS
Roblox is a widely popular game that has taken the gaming world by storm. With its unique gameplay and extensive library of user-created content, it has become a go-to game for people of all ages. Whether you are a seasoned player or just getting started, one thing that can enhance your experience is the ability to record your gameplay on iOS. This article will provide all the information you need to know about recording Roblox mobile gameplay on iOS, including step-by-step instructions, the best tools to use, and tips for creating high-quality recordings.
Enable Screen Recording in the Control Centre
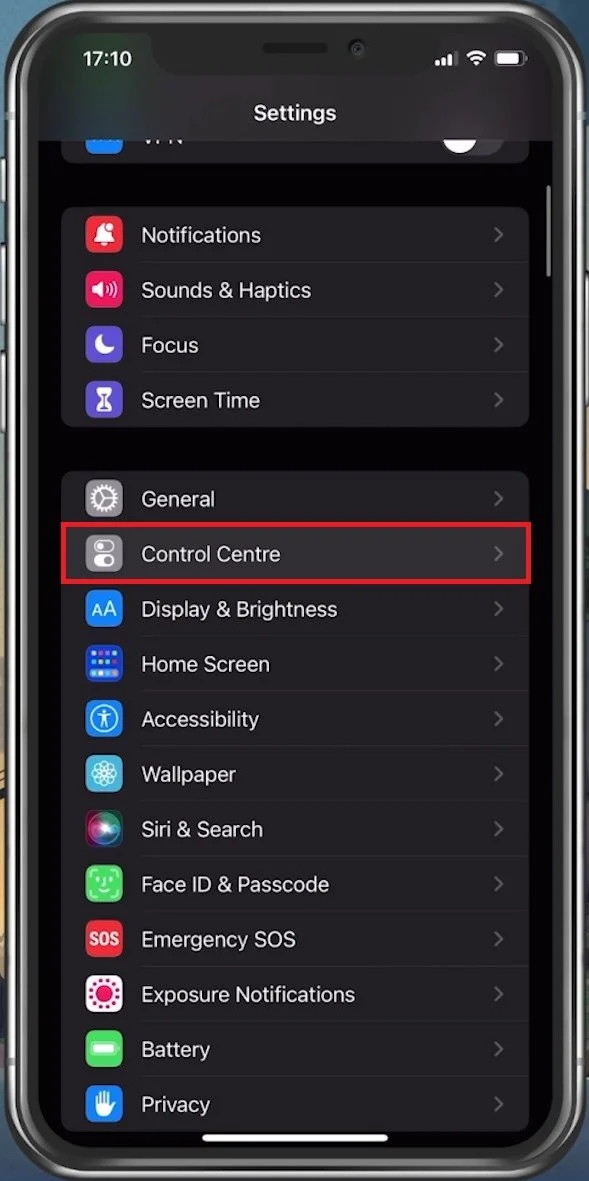
Open up your iOS settings application and navigate to the Control Centre section.
iPhone Settings > Control Centre
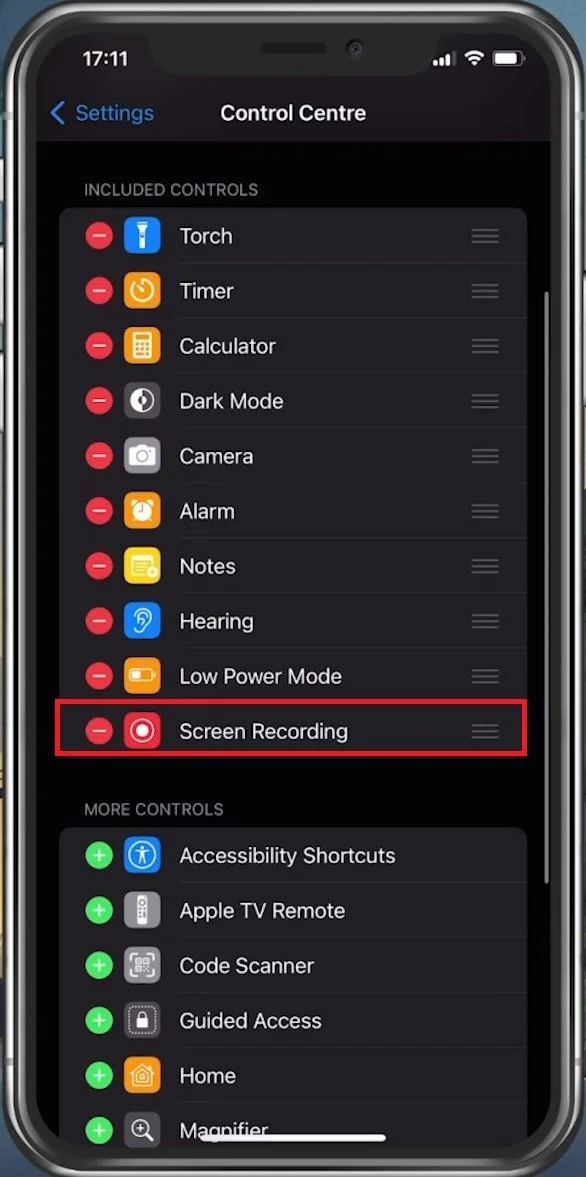
Add the Screen Recording to your Included Controls. This will make it much easier to start and stop your recording while playing Roblox.
Included Controls > Screen Recording
Record Roblox Gameplay on your iOS Device
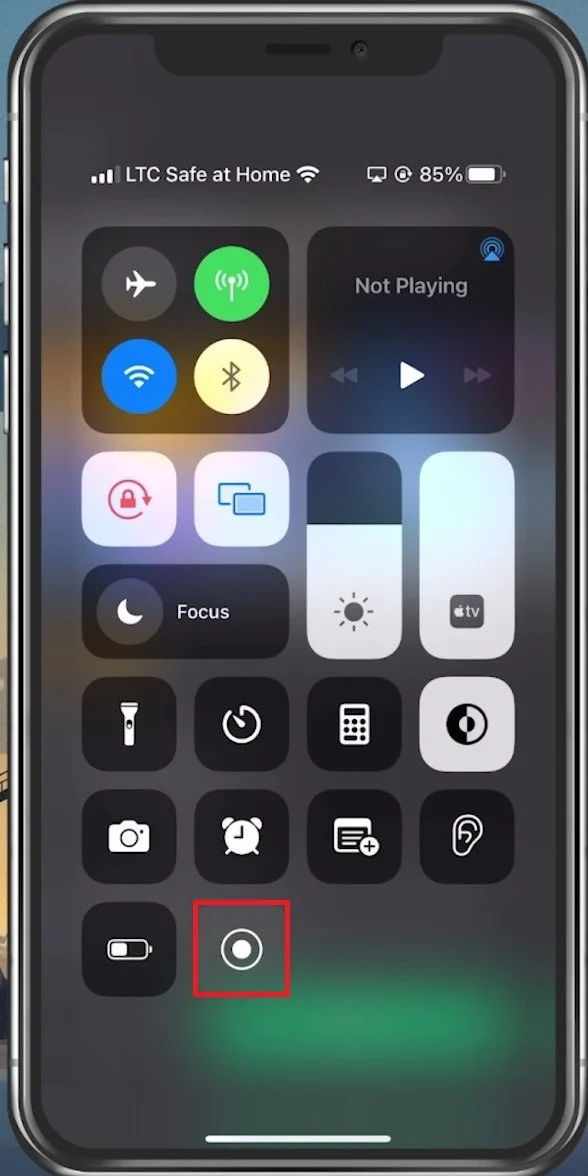
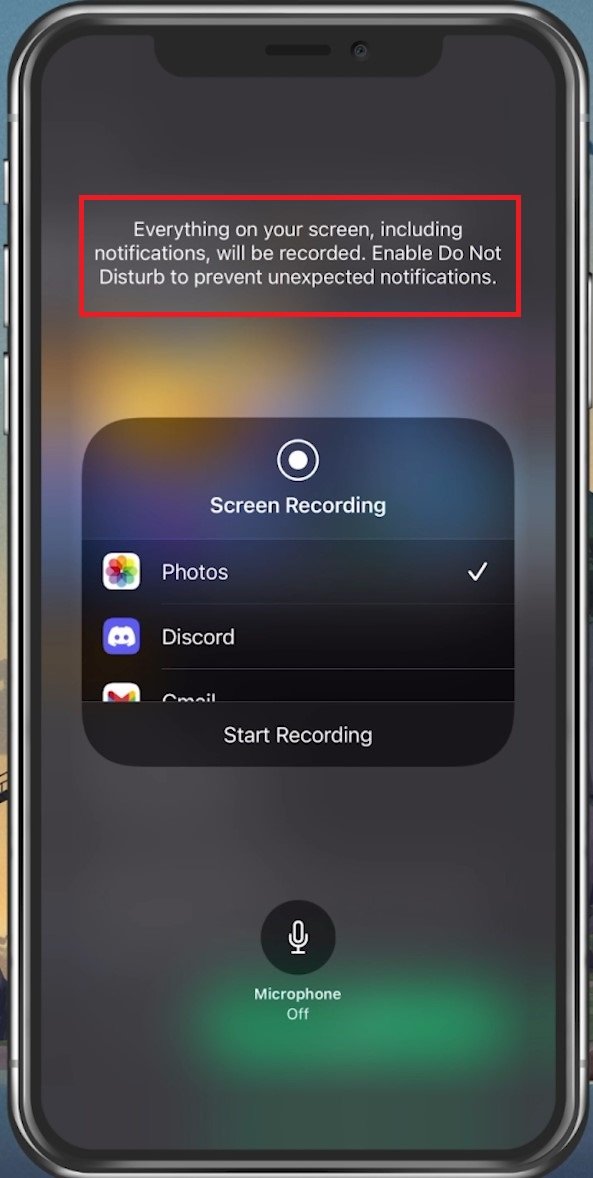
Launch Roblox on your device. Open your Control Panel, and tap on the Screen Recording icon. This will start the timer, where after three seconds, your device will start recording
Start the recording on your device
Stop Recording Roblox Gameplay
After you’re done, re-open the Control Centre and tap the icon again. The screen recording will automatically be saved to your Photos.
Stop the Recording
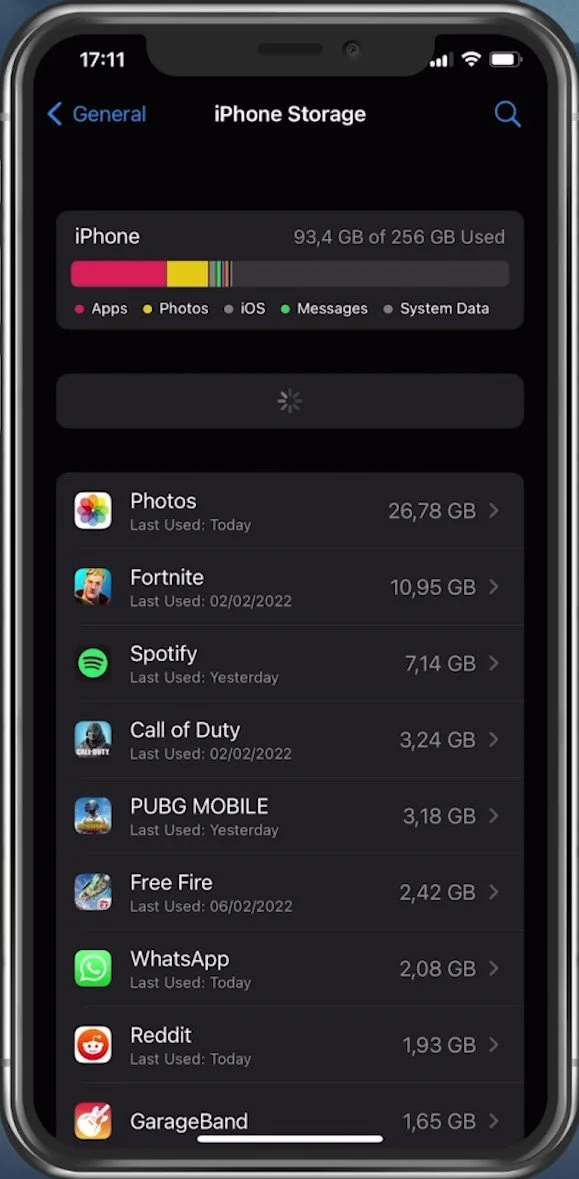
Ensure Enough Storage for Roblox & Recordings
If the screen recording is not saved, you might not have enough storage left on your device. Navigate back to your settings and tap on General. In your Storage settings, you can preview the amount of storage you have left and recommendations on clearing up some space for your recordings.
iPhone Settings > General > iPhone Storage
Edit Roblox Gameplay Recording
If you intend on editing your recording, we suggest using the iMovie application, which should come preinstalled on your device. Create a project and import your videos to start editing. You can even upload your videos directly to YouTube without using a PC in the process.
Use iMovie to edit your Roblox recording


