Premium Logo Reveal Animation Premiere Pro - Guide & Template
Introduction
Unlock the potential of Adobe Premiere Pro with our straightforward guide on crafting a premium logo reveal animation. This tutorial simplifies creating a sophisticated logo animation using a customizable template from Envato Elements. The tutorial is ideal for anyone looking to enhance their brand's visual appeal, from downloading and extracting the template to importing and editing it within Premiere Pro. With easy-to-follow steps, you'll learn to seamlessly integrate your logo, adjust the tagline, and fine-tune the animation to suit your brand identity. Whether you're a seasoned editor or new to Premiere Pro, this guide will help you effortlessly create a professional-looking logo reveal.
Downloading and Extracting the Premiere Pro Logo Reveal Template
Creating a stunning logo reveal in Premiere Pro begins with a great template. Here's how to download and prepare your template for use:
Downloading the Template:
Access Envato Elements:
Click here to access the Premium Logo Reveal Animation template.
Get the Template:
Sign up for Envato Elements to access the desired logo reveal template, along with a vast array of add-ons, plugins, and templates suitable for Premiere Pro.
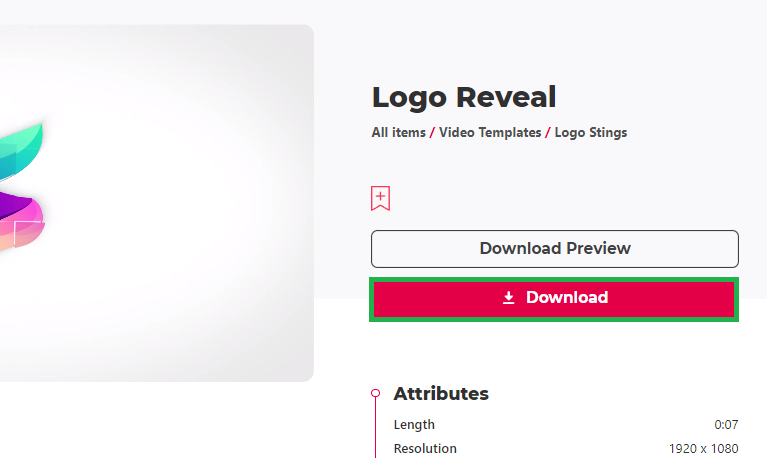
Download Process:
Find and download the template easily. It will be saved as a compressed file in your downloads folder.
Download Premium Logo Reveal Animation Template for After Effects
Extracting the Template File:
Locate the Downloaded File:
In your downloads folder, find the recently downloaded .zip file.
Extraction Steps:
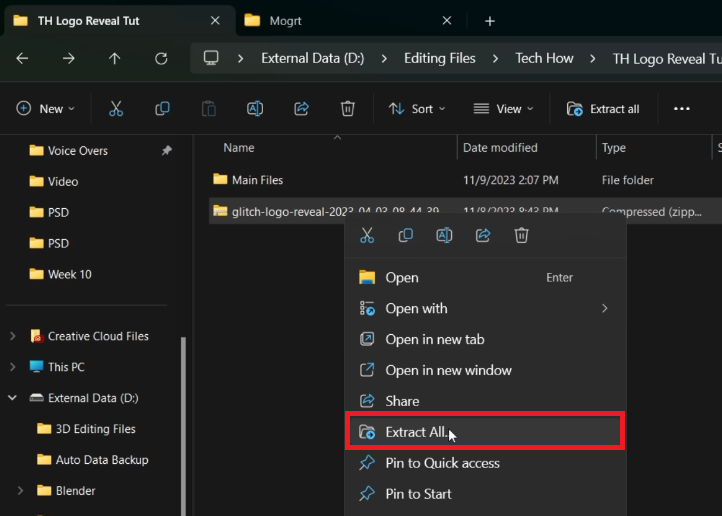
For Windows: Right-click the .zip file and select 'Extract All' to your preferred location.
For Mac: Double-click the .zip file to automatically extract its contents.
Accessing the Template:
A new folder will appear post-extraction, containing the template file ready for use.
This straightforward process sets you up for creating an eye-catching logo reveal animation in Premiere Pro with a professionally designed template from Envato Elements.
Extract the downloaded template file
Setting Up Your Premiere Pro Project for Logo Animation
Creating a logo reveal animation in Premiere Pro is a streamlined process. Here's a step-by-step guide to set up your project and import the necessary assets:
Initiate Your Premiere Pro Project:
Open Premiere Pro:
Launch Adobe Premiere Pro and open the project where you want to create the animation.
Adjust Workspace:
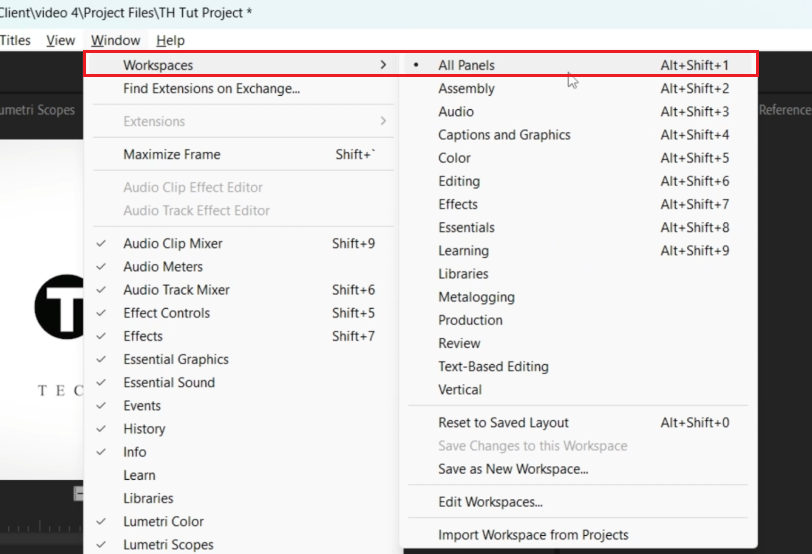
Go to the "Windows" option in the title bar.
Select "All Panels" under workspaces to optimize your layout for editing.
Premiere Pro Windows > Worspaces > All Panels
Importing Your Logo:
Check Project Section:
Ensure your logo file is already imported into the project section. If not, import it by dragging and dropping the file into this section.
Installing Motion Graphics Template:
Access Essential Graphics:
Click on "Essential Graphics" located on the right side of the Premiere Pro interface.
Install Template:
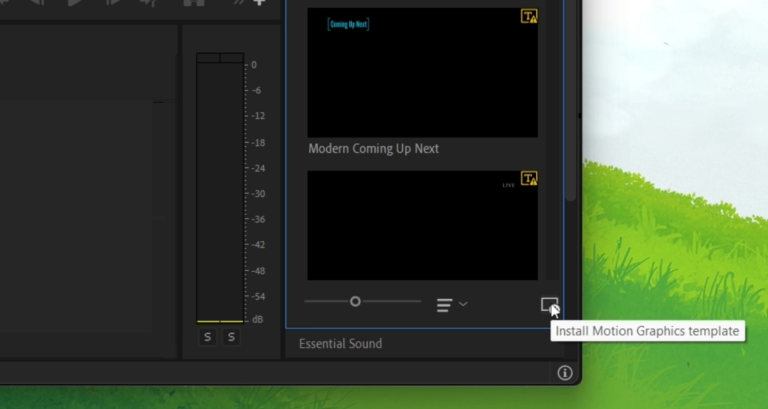
In the Essential Graphics panel, find the small button at the bottom right corner for installing a new motion graphics template (MOGRT).
Click this button and navigate to the folder where you extracted your template.
Select and Install Template:
Within the MOGRT folder, locate and click on the logo reveal template.
Click "Open" to add it to your project.
Install Motion Graphics Template
Creating a New Composition:
Initiate Composition Creation:
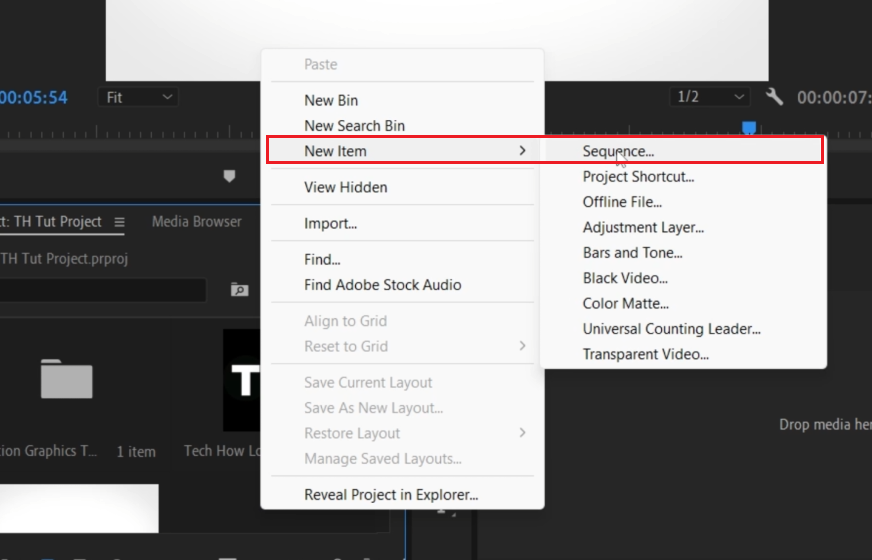
Right-click in the blank space of the project window.
Create New Sequence:
Select "New Item" and then choose "Sequence."
Name Your Sequence:
Assign a name to your sequence and press Enter.
By following these steps, your Premiere Pro workspace will be perfectly set up with the necessary assets, and you'll be ready to start creating your premium logo reveal animation.
New Item > Sequence
Customizing Your Logo Animation in Premiere Pro
After importing the template into Premiere Pro, follow these steps to personalize your logo animation:
Adding the Template to Your Sequence:
Place Template in Sequence:
Drag and drop the imported template into your sequence.
Sequence Settings Prompt:
If a prompt appears asking to change sequence settings, confirm the changes based on your preferences.
Editing the Logo:
Access Template Layer:
Double-click on the template layer in your sequence to open the editing window.
Import and Place Logo:
Drag and drop your logo (preferably in PNG format with a transparent background) from the project window onto the designated area in the edit window.
Changing the Tagline:
Edit Text:
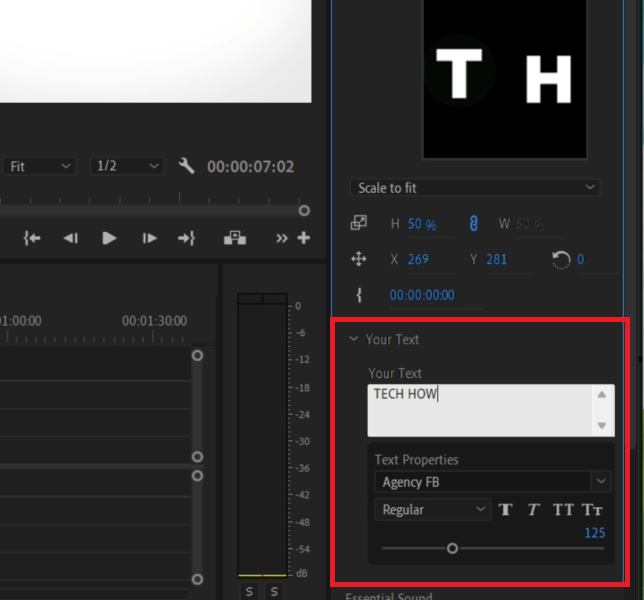
Click on the text box within the template.
Enter your desired tagline, like "TECH HOW," or any other phrase you choose.
Change the template tagline
Previewing and Exporting the Animation:
Preview Your Work:
Play the footage in your sequence to preview the animation.
Exporting the Final Video:
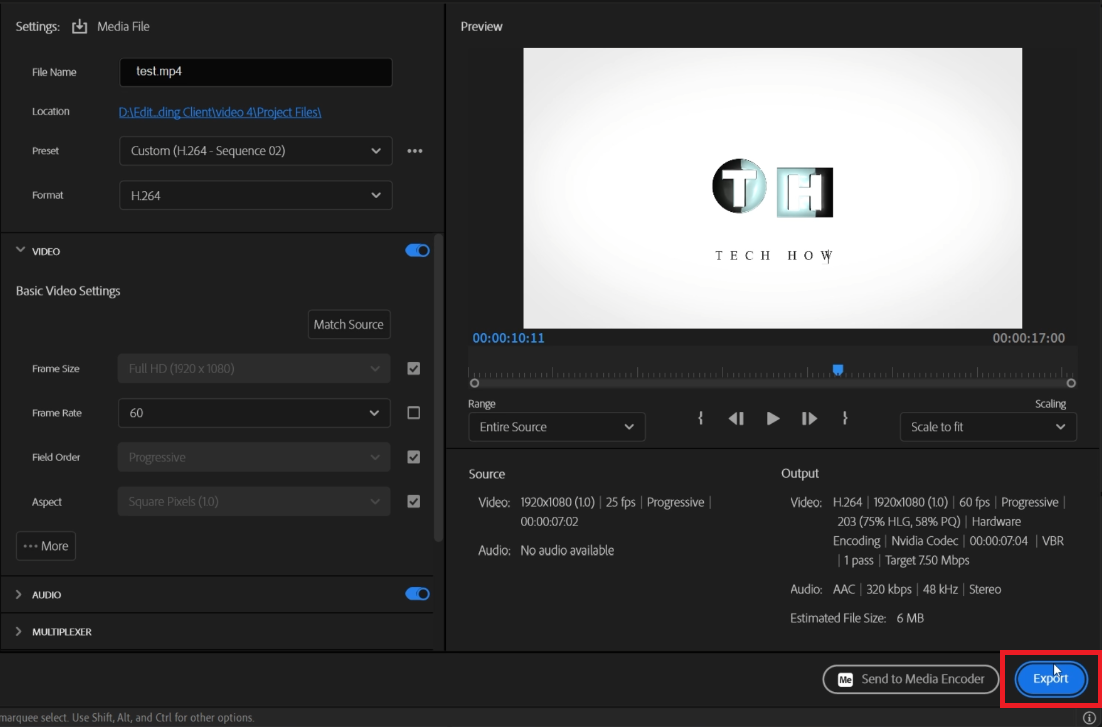
Press CTRL + M to open the export settings.
Adjust render settings and location as needed.
Click the export button to start rendering your final logo reveal animation.
These steps will guide you through customizing and exporting a professional-looking logo reveal animation in Premiere Pro, tailored to your brand or project needs.
Export your premium logo animation in Premiere Pro
-
After downloading the template from Envato Elements, drag and drop it into your Premiere Pro sequence. Ensure you've extracted the template file if it's compressed.
-
It's best to use a PNG format for your logo, as it supports transparent backgrounds, which is crucial for a clean logo reveal.
-
If a prompt appears regarding sequence settings, you can confirm the changes to match the template for optimal results.
-
Double-click the text box in the template edit window and enter your desired tagline or text.
-
Press CTRL + M to open export settings, adjust render settings and location as needed, and then click the export button to start rendering.
Affiliate Disclosure: Some of the links on this page are affiliate links, which means that we may earn a commission if you click through and make a purchase from our recommended template providers. This doesn’t affect the price you pay and helps us maintain this site to continue providing you with the best template recommendations.


