Best Minimalist Text Animations - After Effects Tutorial & Template
Introduction
Dive into the world of minimalist text animations with After Effects in this hands-on tutorial. We'll guide you through creating sleek, professional-looking text animations that stand out with their simplicity and elegance. Utilizing a user-friendly template from Envato Elements, this tutorial makes it easy for anyone to craft compelling text animations, perfect for modern digital projects. Whether you're a beginner or a seasoned After Effects user, you'll find valuable insights and tips to enhance your animation skills.
How to Download and Extract the Minimalist Text Animation Template
Creating minimalist text animations in After Effects starts with a suitable template. Here's a step-by-step guide to downloading and preparing your template from Envato Elements:
Downloading the Template
Access Envato Elements:
Click here to visit the After Effects template download page.
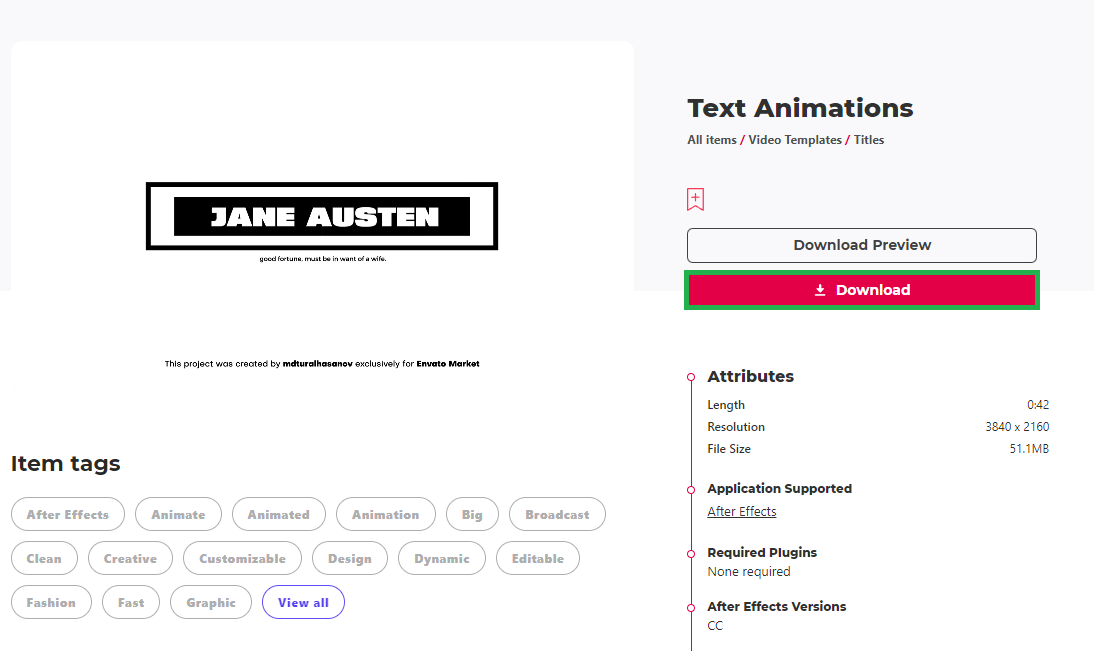
Get the Template:
Sign up for Envato Elements if you haven't already. This gives you access not only to the specific text animation template but also to a vast array of add-ons, plugins, and templates for After Effects and other creative applications.
Locate the minimalist text animation template and initiate the download.
Download Text Minimalist Animation Template for After Effects
Extracting the Template File
Locate the Downloaded File:
Find the downloaded file in your 'Downloads' folder. It will typically be a compressed .zip file.
Unzip the File:
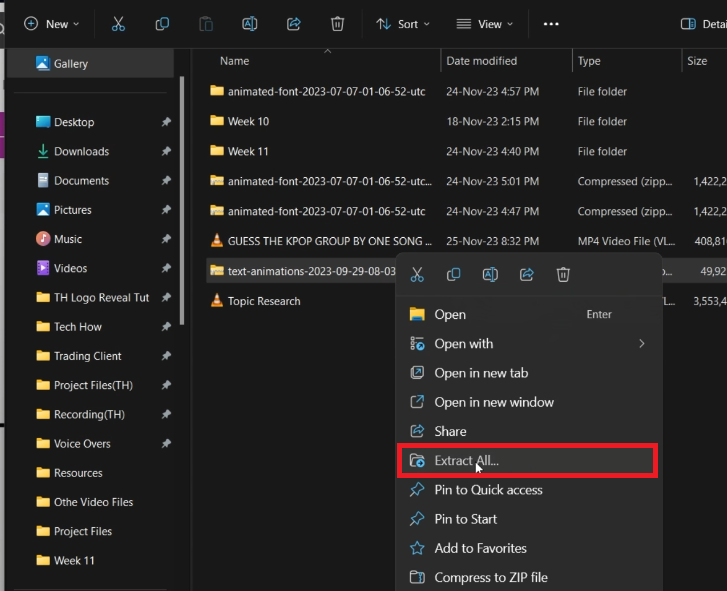
On a Windows PC: Right-click the .zip file and select 'Extract All' to unzip it in the same folder.
On a Mac: Double-click the .zip file, and it will automatically extract.
Access the Template:
After extracting, a new folder containing the After Effects template file will open.
Locate the template file and drag it into your After Effects project workspace.
Click the arrow icon to view the project's contents, where you'll find six unique text animation styles.
With the template now ready in your After Effects workspace, you can begin to explore and customize the various animation styles to suit your project's needs.
Extract the downloaded template file
Editing the 'Title 1' Text for Animation in After Effects
Customizing the 'Title 1' text in your minimalist animation template is straightforward. Here's how you can edit it to suit your project's needs:
Accessing the 'Title 1' Composition
Open the 'Title 1' Composition:
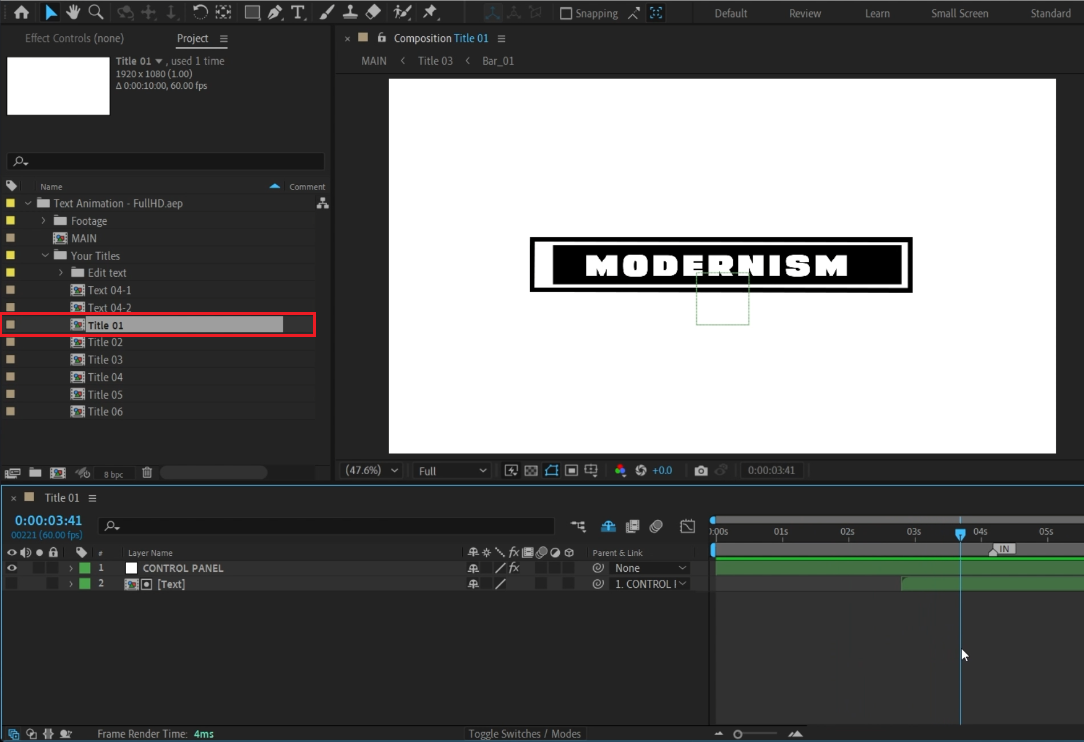
In your After Effects project, locate the 'Your Titles' folder.
Within this folder, find and double-click on the 'Title_1' composition. This area is where you'll create your animation.
Edit Title 1 from the selection of scene templates
Customizing the Text
Edit the Text Layer:
In the 'Title_1' composition, you'll see several layers that contribute to the animation.
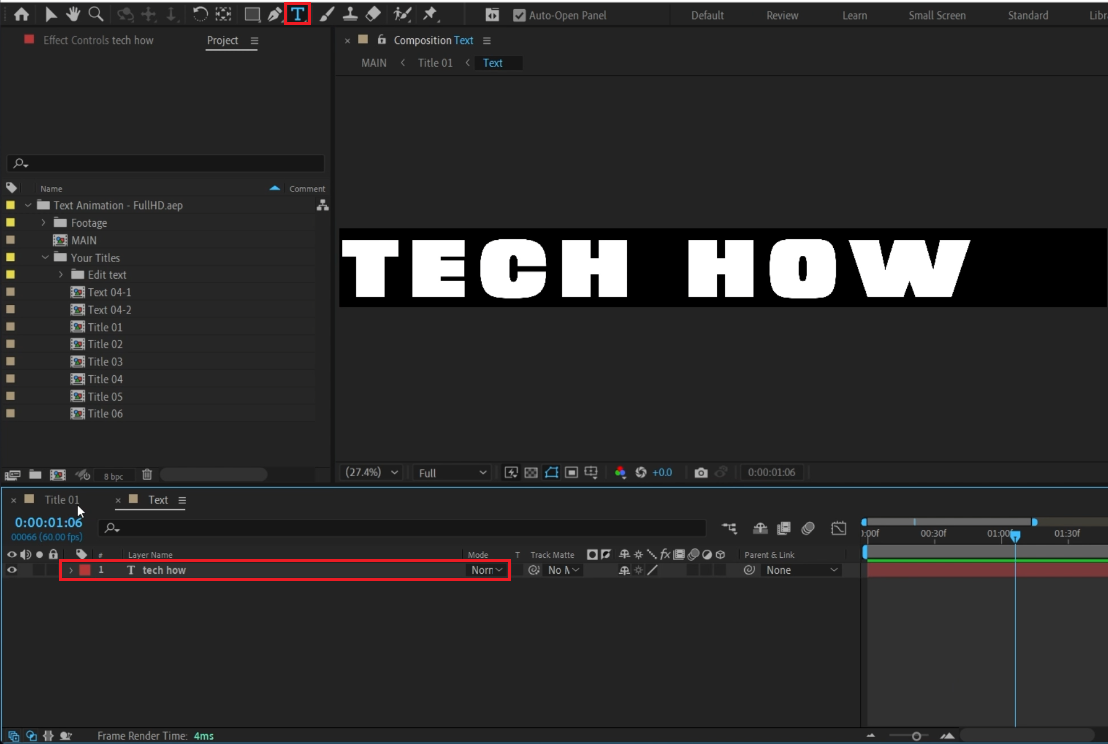
Find the layer labeled 'Text' and double-click it to edit.
For example, change the existing text to 'TECH HOW' or any text of your choice. Simply click on the text layer and begin typing your desired text.
By following these steps, you can easily customize the 'Title 1' text in your After Effects project, tailoring the animation to fit your specific requirements. This process can be replicated for other text templates within your project, allowing for a consistent and personalized animation style.
Adjut the text layer for the Title 1 composition
Previewing and Exporting Your After Effects Animation
After customizing your text animation in After Effects, the next crucial steps are previewing and exporting your project. Here's how to ensure your animation looks great and is ready for sharing or integrating into your work.
Previewing Your Animation
Return to the Main Composition:
Switch back to the 'Title 1' composition to view your edited animation.
Check the Animation Preview:
Initially, the preview might lag. Wait until the timeline turns green, indicating that the playback has been rendered and should now run smoothly.
If needed, make any additional adjustments to the text or animation properties at this stage.
Exporting the Finished Animation
Export the Animation:
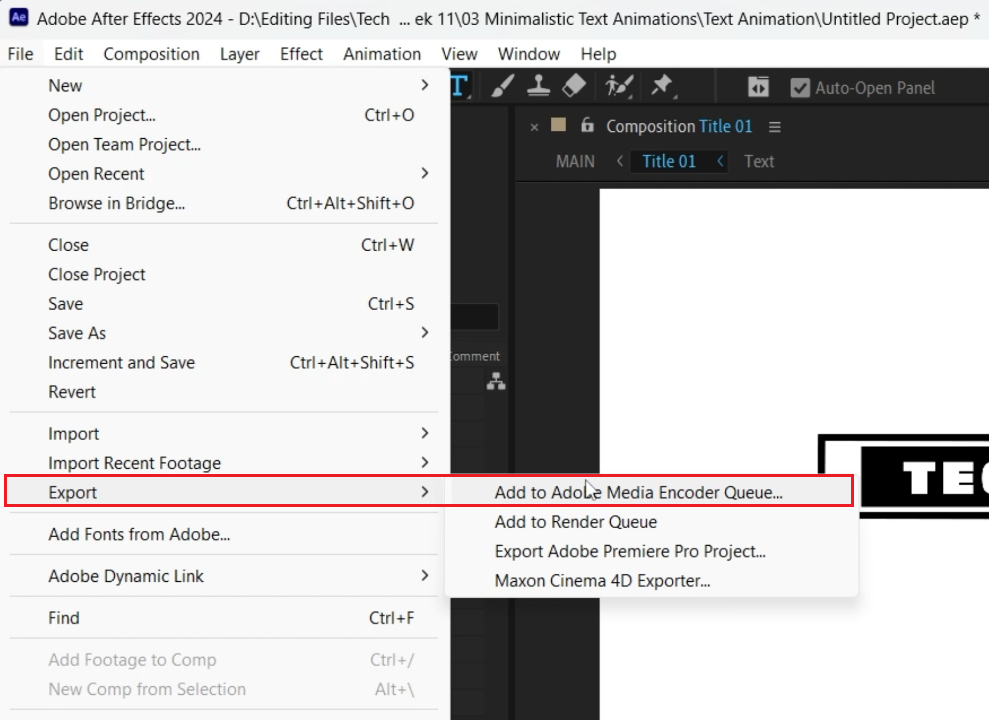
To prepare your animation for export, go to 'File' -> 'Export' -> 'Add to Media Encoder Queue' in After Effects.
This action will send your composition to Adobe Media Encoder.
In Media Encoder, your composition will appear in the queue.
Click the 'Start' button in Media Encoder to begin the rendering process.
By following these steps, you can create a professional-looking animation in After Effects, preview it to ensure it meets your standards, and export it smoothly for use in various digital formats or platforms.
After Effects > File > Export > Add to Adobe Media Encoder Queue…
-
In the After Effects project, open the composition (like 'Title 1') and double-click the 'Text' layer to edit it. You can then type in your desired text and adjust its properties.
-
Yes, most templates offer multiple layers and compositions, allowing you to customize each text element separately within the same animation.
-
Absolutely. After editing, return to the main composition to preview your animation. The playback may lag initially but will smooth out once fully rendered.
-
Navigate to 'File' -> 'Export' -> 'Add to Media Encoder Queue'. Then, use Adobe Media Encoder to finalize and start the rendering process.
-
You can always go back to the composition to adjust the text and animation settings before exporting your final project.
Affiliate Disclosure: Some of the links on this page are affiliate links, which means that we may earn a commission if you click through and make a purchase from our recommended template providers. This doesn’t affect the price you pay and helps us maintain this site to continue providing you with the best template recommendations.


