Create Glitch Reflection Logo Reveal in After Effects + Template
Introduction
Embark on a creative journey to craft a stunning "Glitch Reflection Logo Reveal" animation in After Effects, perfect for adding a dynamic touch to your branding. This tutorial is tailored to be user-friendly, guiding you through each step of the animation process. We'll start by utilizing a ready-to-use template from Envato Elements, which offers a plethora of add-ons and templates to enhance your After Effects projects. You'll learn how to seamlessly import and position your logo, ensuring it's perfectly scaled and set for the animation. This guide is ideal for those looking to create eye-catching logo animations with a glitchy, reflective twist, regardless of their prior experience with After Effects. Let's dive into the world of animated logos and bring your brand to life with a modern, digital flair!
How to Download and Extract an After Effects Template from Envato Elements
Creating stunning visual effects in After Effects starts with the right template. Here’s a simple guide on how to download and set up an After Effects template from Envato Elements:
Downloading the Template:
Access Envato Elements:
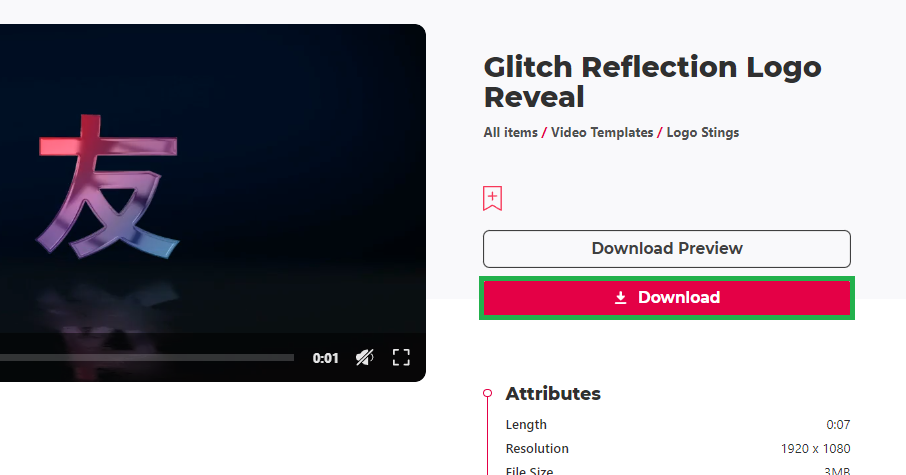
Visit this Envato Elements page.
Sign Up and Gain Access:
Register or log in to Envato Elements to access a wide array of templates and add-ons for After Effects.
Download the Template:
Select the desired template and download it. It will typically be saved as a compressed (.zip) file in your downloads folder.
Download Glitch Reflection Logo Reveal Template
Extracting the Template File:
Locate the Downloaded File:
Navigate to your downloads folder on your Windows PC or Mac.
Extract the Template:
For Windows, right-click the .zip file and choose ‘Extract All’.
On a Mac, double-click the .zip file to automatically extract it.
Access the Template:
Once extracted, a new folder will appear containing the After Effects template file.
By following these steps, you can easily start working with professional After Effects templates, which can significantly enhance your video projects.
Extract the downloaded template file
Editing the Glitch Reflection Logo Animation in After Effects
Creating a Glitch Reflection Logo Animation in After Effects is a straightforward process. Here's how to edit and personalize your project:
Importing and Setting Up Your Logo:
Add Project File to Workspace:
Drag and drop the project file into the After Effects workspace.
Access Project Contents:
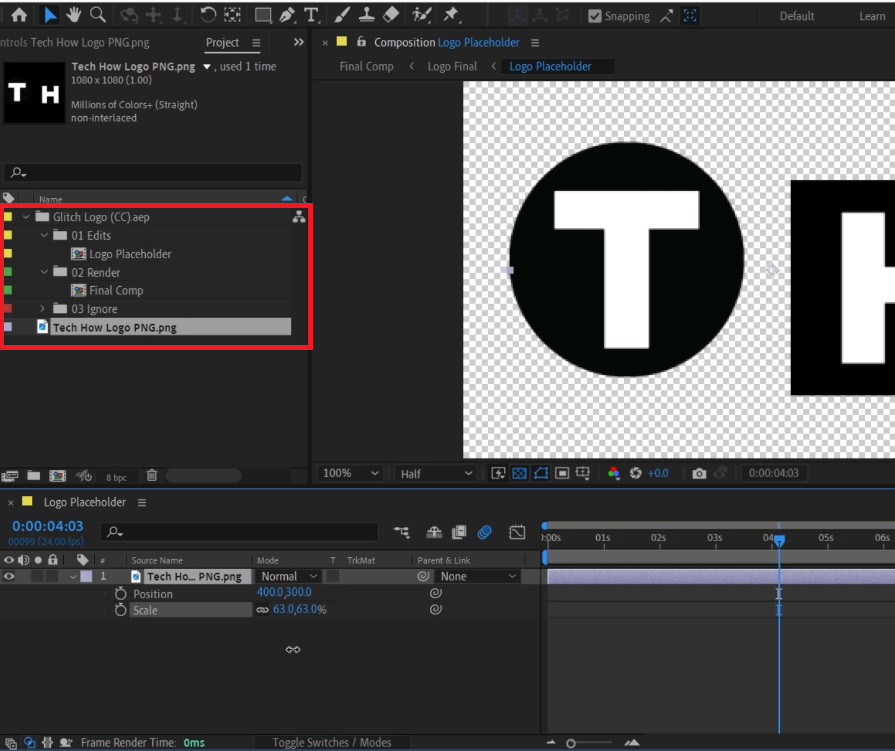
In the project panel, click the arrow to view the contents of the imported project.
Locate 'Logo Placeholder' Composition:
Find and double-click on the composition named "logo placeholder".
Import Your Logo:
If not already done, drag and drop your logo into the project panel.
Then, move the logo file from the project panel to the timeline.
Adjusting Logo Position and Size:
Select Logo Layer:
Click on the logo layer in the timeline.
Resize and Reposition:
Press the 's' key for scaling to adjust the size.
Use shift+p for repositioning your logo as needed.
Logo Format Tip:
Use a logo with a transparent background, preferably in PNG format, for better integration.
Previewing the Animation:
Open 'Final Comp':
Navigate and double-click on the composition labeled "final comp".
Preview the Animation:
Here, you can preview the logo reveal animation.
Note: Initial playback might be slow, but it smoothens out after the timeline is fully rendered (indicated by a green line above the timeline).
By following these steps, you can effectively edit and customize the Glitch Reflection Logo Animation, ensuring that your logo is perfectly integrated into this dynamic visual effect.
Double-click the editable layer
Exporting Your Glitch Reflection Logo Animation in After Effects
Once you’ve completed editing your animation, the final step is exporting it. Here’s a simple guide to exporting your project using Adobe Media Encoder:
Initiating the Export Process:
Access Export Options:
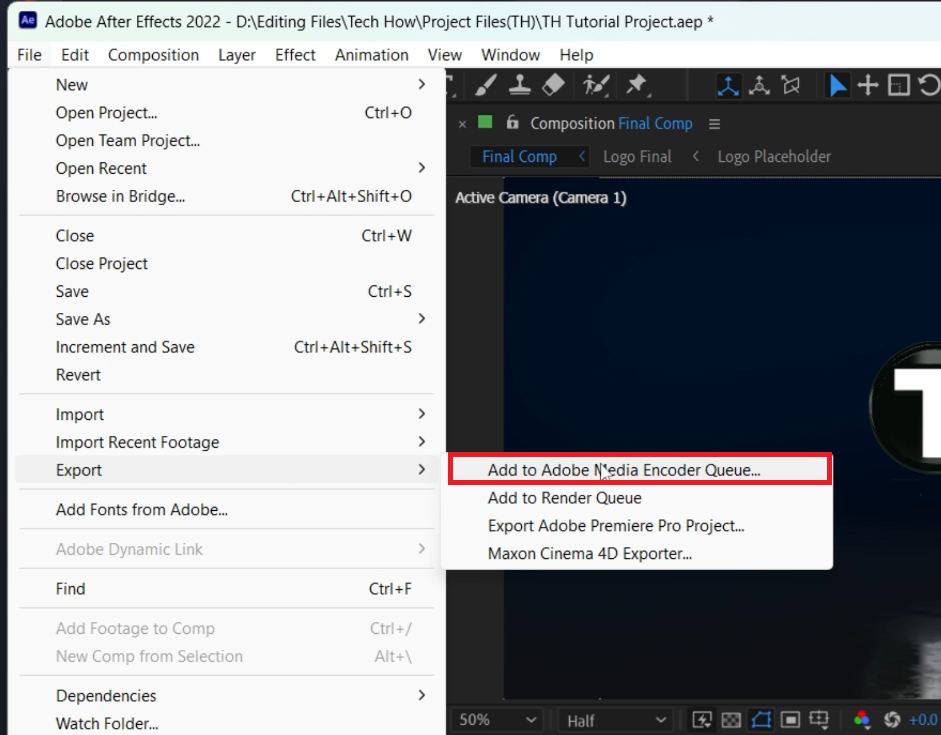
In After Effects, click on "File" in the menu bar.
Select Export Method:
Choose "Export," then click on "Add to Media Encoder Queue."
Using Adobe Media Encoder:
Wait for Encoder Queue:
The project may take some time to appear in the Adobe Media Encoder queue, depending on your computer's performance.
Start Rendering:
Once your project is visible in Adobe Media Encoder, click the start button to begin the rendering process.
Completing the Export:
Final Output:
After the rendering process is complete, your Glitch Reflection Logo Reveal animation will be successfully exported and ready for use.
Exporting your animation through Adobe Media Encoder ensures a high-quality final product, making your Glitch Reflection Logo reveal ready for showcasing across various platforms.
After Effects > File > Export > Add to Adobe Media Encoder Queue…
-
Begin by downloading a template from Envato Elements, and then import it into After Effects for customization.
-
Yes, you can import your logo, ideally in PNG format with a transparent background, and place it in the 'logo placeholder' composition.
-
Select the logo layer, press 's' for scaling to adjust the size, and shift+p to reposition the logo in the timeline.
-
Initial playback may be slow, but once the timeline is fully rendered (green line above the timeline), playback will be smoother.
-
Click on "File," then "Export," and select "Add to Media Encoder Queue." Use Adobe Media Encoder to render and export the final animation.
Affiliate Disclosure: Some of the links on this page are affiliate links, which means that we may earn a commission if you click through and make a purchase from our recommended template providers. This doesn’t affect the price you pay and helps us maintain this site to continue providing you with the best template recommendations.
