How To Password Protect Folders on Mac OS Ventura
Mac OS Ventura has an excellent reputation for being one of the most secure operating systems. However, if you have sensitive information saved on your computer, you might still want to take extra precautions to protect it. Fortunately, it is possible to password-protect folders on Mac OS Ventura to ensure that only authorized users have access to them. This article will explore the steps you need to follow to password-protect your folders in Mac OS Ventura.
Create Image from Folder
First, locate the file or folder you wish to password-protect, such as a folder on my desktop. Next, open up your Disk Utility application. Search for disk utility in your spotlight search to open it up.
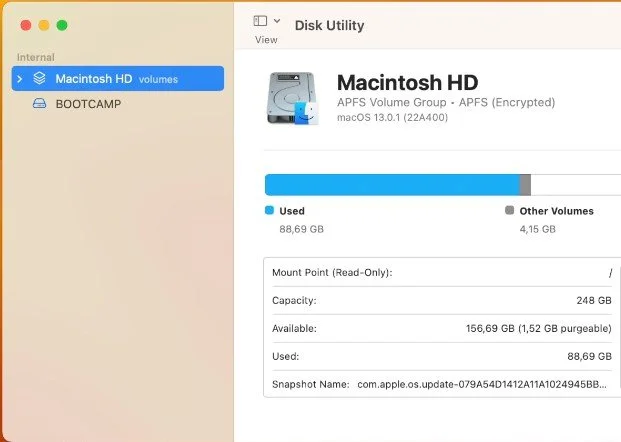
Disk Utility
Here, navigate to File > New Image > Image from Folder…
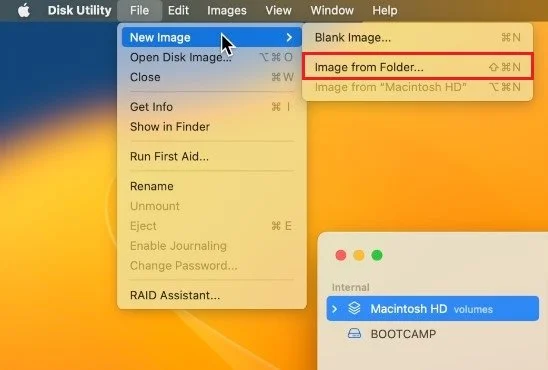
Disk Utility > File > New Image > Image from Folder…
This will allow you to choose the folder or file in your Finder. Click on Choose.

Find folder to password protect
Password Protect Selected Folder
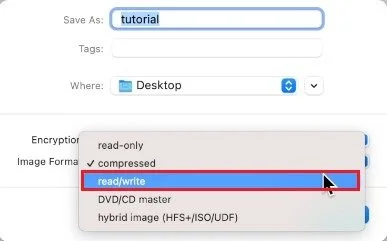
Next, please enter the name of the protected folder, where to save it, and most importantly, set the Encryption option to 128-bit AES encryption or 256-bit AES encryption. For most users, the first encryption option should suffice.
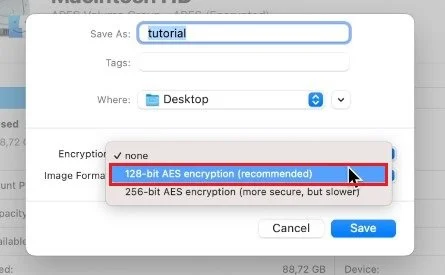
Choose encryption for folder
You will be prompted to enter a password for your new file.
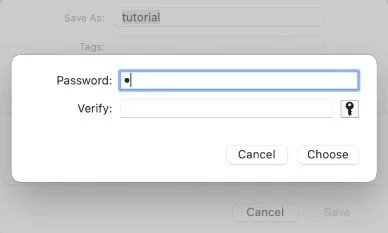
Lastly, set the Image Format to read-only or read-and-write, depending on how you want to protect your files. Setting this to read and write will make the most sense for most users, as you can still edit or delete your files later.
Click on Save, which will take a couple of seconds to create the file. You can then delete the original file, and when double-clicking the secured .dmg file, you will be asked to enter the password you set. A new file will be created, allowing you to access the locked files. When you’re done, you can eject the folder and keep the encrypted file on your Mac.
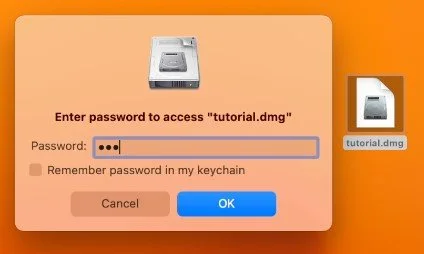
Enter password to open folder
-
Unfortunately, no. There is no other built-in option for password protecting folders on Mac OS Ventura.
-
Yes, you can password protect as many folders as you like on Mac OS Ventura. All you need to do is follow the steps in the Disk Utility process for each folder.
-
Yes, the password protection feature in Mac OS Ventura is very secure. The Disk Utility tool uses AES-128 encryption, which is a widely used and highly secure encryption method.
-
Yes, you can share a password protected folder with other users by giving them the password to unlock the disk image. However, it's important to be careful when sharing sensitive information, and to only share it with trusted individuals.
-
Well, you'll be stuck outside the door with all your secrets locked up inside. Good luck!