How To Adjust Dock & Menu Bar on Mac OS Ventura
Welcome to the exciting world of customization on Mac OS Ventura! If you're looking to adjust your dock and menu bar, you've come to the right place. With just a few clicks, you can give your Mac a new look and feel that's uniquely you. In this article, we'll guide you through the process and help you take your Mac to the next level of personalization.
Mac OS Software Update
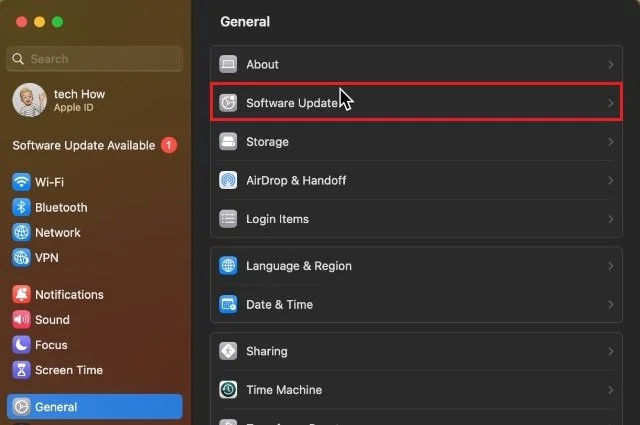
While using your Mac, click on the Apple icon on the top left of your screen and navigate to your System Settings. If these settings look a bit different on your device, then ensure that you’re running the latest macOS version.
In your General settings, click on Software Update. Here, proceed to download the latest OS update before restarting your Mac.
System Settings > General > Software Update
Desktop & Dock Settings
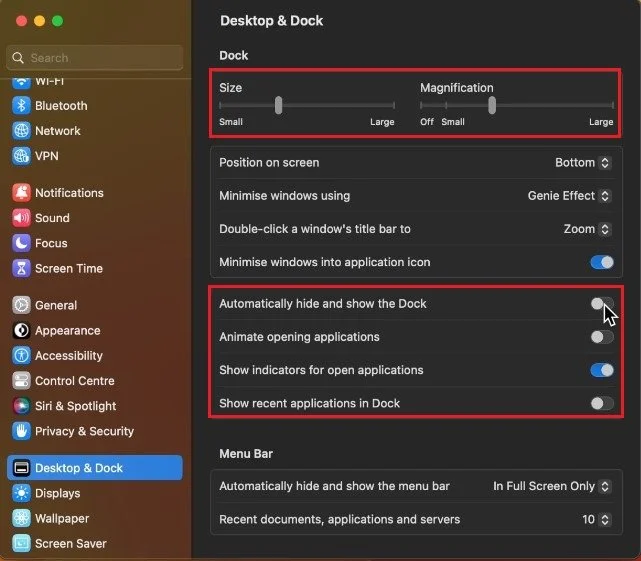
Back in your settings, navigate to the Desktop & Dock section. First, I will disable the Automatically hide and show the Dock option to preview better changes made in your settings. Under Dock, change the overall size of your dock. This will come down to the size of your display and the number of apps you wish to see.
Next, change the magnification amount, and set this slider to Off if you want to disable magnification when hovering your cursor over the dock icons. Below, change the dock position on your screen. By default, it will show up on the bottom of your screen. The next option allows you to choose an effect when minimizing windows. Most of these settings will come down to personal preference, so choose what works best.
I like to enable the Minimize windows into the application icon option. This will minimize the window into the app’s icon in your dock instead of showing a small version of the window on the right side of your dock. This will, in turn, also reduce the amount of space needed for your dock when you use multiple applications simultaneously.
System Settings > Desktop & Dock > Dock
Next, you can automatically hide and show the dock when moving your cursor to the bottom edge of your screen. I usually keep this option enabled as it allows you to utilize more space on your screen. When enabling the Animate opening applications option, then the app’s icon in your dock will be animated until the application is running.
You can choose to see a small dot under the application when it’s running on your Mac. This can also help you in finding commonly used apps in your dock. Lastly, enable the Show recent applications in Dock option if you want to see a couple of application icons added on the right-hand side of your dock alongside your other app icons.
Menu Bar Settings
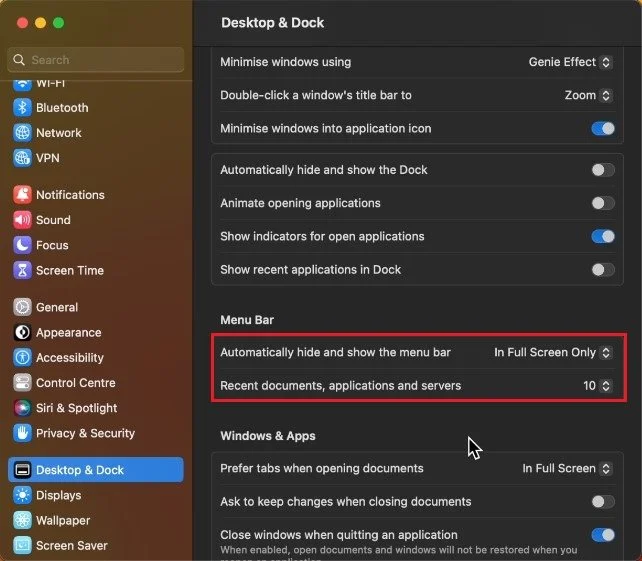
In your Menu bar settings, you can, as with your dock, choose to hide the Menu bar when not moving your cursor to the top of your screen or when using an application in full-screen mode.
System Settings > Desktop & Dock > Menu Bar
Show or Hide Apps in the Menu bar
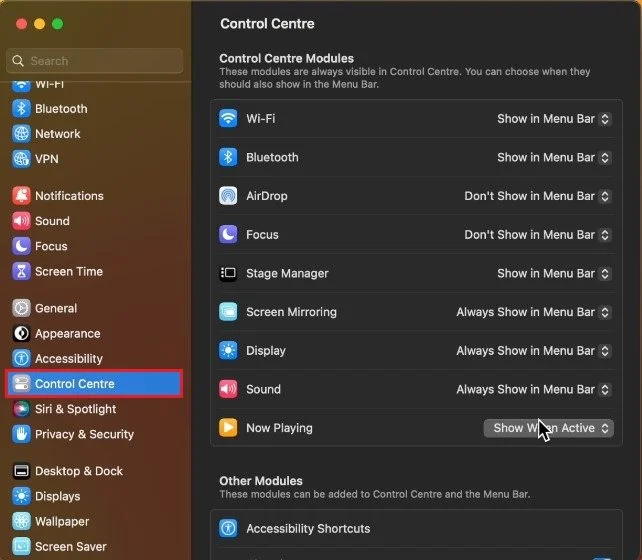
Next, navigate to your Control Centre settings. Here, you can show or hide some options in your Menu bar. This could be your focus mode, display and sound options, battery information, keyboard brightness, or your VPN connection.
System Settings > Control Centre
Arrange Apps in Dock
After choosing which app or service to show in your Menu bar, you can close your settings and re-arrange your dock icons by dragging them to the left or right side.
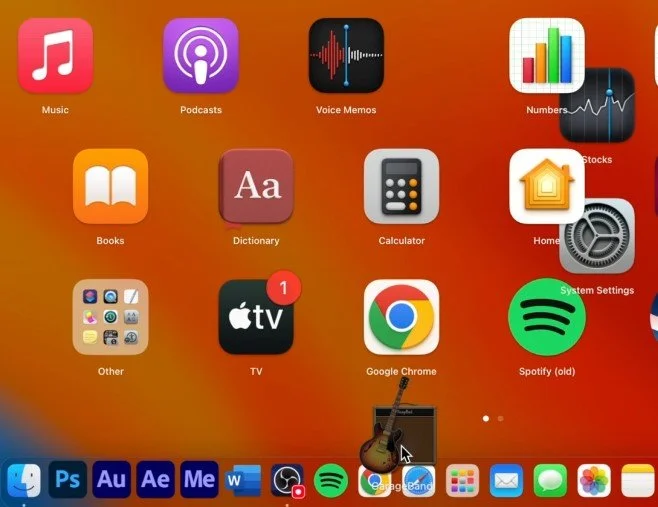
When dragging an icon out of your dock, it will be removed. If you wish to add application icons to your dock, open your Launchpad. From here, drag and drop the application icon into your dock.
Launchpad
-
The dock is the bar that appears at the bottom of the screen and displays open applications, while the menu bar is the bar at the top of the screen that displays the Apple menu, status icons, and the clock.
-
Yes, you can change the location of the dock on Mac OS Ventura by going to "Dock Preferences" and selecting "Position on Screen." You can choose from bottom, left, or right.
-
To add items to the dock, simply drag and drop the application icon from your Applications folder to the dock. To remove items, drag the icon from the dock and drop it anywhere else on your desktop.


