Master CarX Drift Racing 2 on PC: Controller Setup with BlueStacks
Introduction
Get ready to experience the exhilarating world of CarX Drift Racing 2 on your PC, and up your game with the added precision of a controller! With the help of BlueStacks, an advanced Android emulator, you can now enjoy CarX Drift Racing 2 on your computer, providing a seamless and immersive gaming experience. In this comprehensive guide, we'll walk you through the process of setting up and optimizing BlueStacks for CarX Drift Racing 2, as well as configuring your controller for an unmatched gaming session. Say goodbye to touch controls and embrace the enhanced performance, stunning visuals, and unparalleled control that comes with playing CarX Drift Racing 2 on your PC using a controller. Let's get started on this thrilling journey and make every drift count!
Download & Install BlueStacks
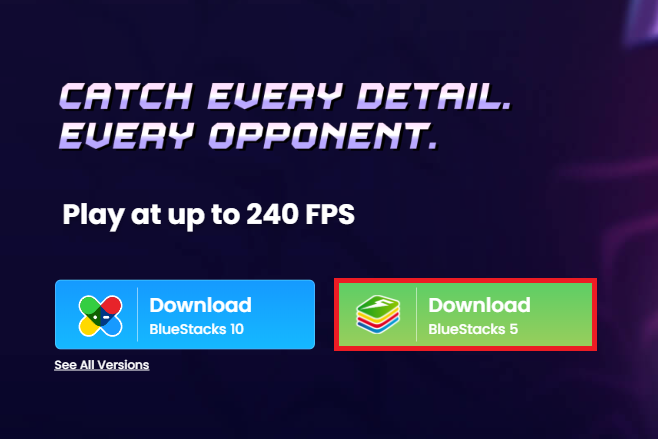
To enjoy CarX Drift Racing 2 on your computer, you'll need an Android emulator like BlueStacks. Widely recognized for its exceptional performance, BlueStacks is designed to optimize PC mobile gaming. The download and installation process is straightforward and quick – follow the on-screen instructions provided by the setup wizard. With BlueStacks installed, you'll be all set to experience CarX Drift Racing 2 in a whole new way on your PC or Mac.
Download CarX Drift Racing 2
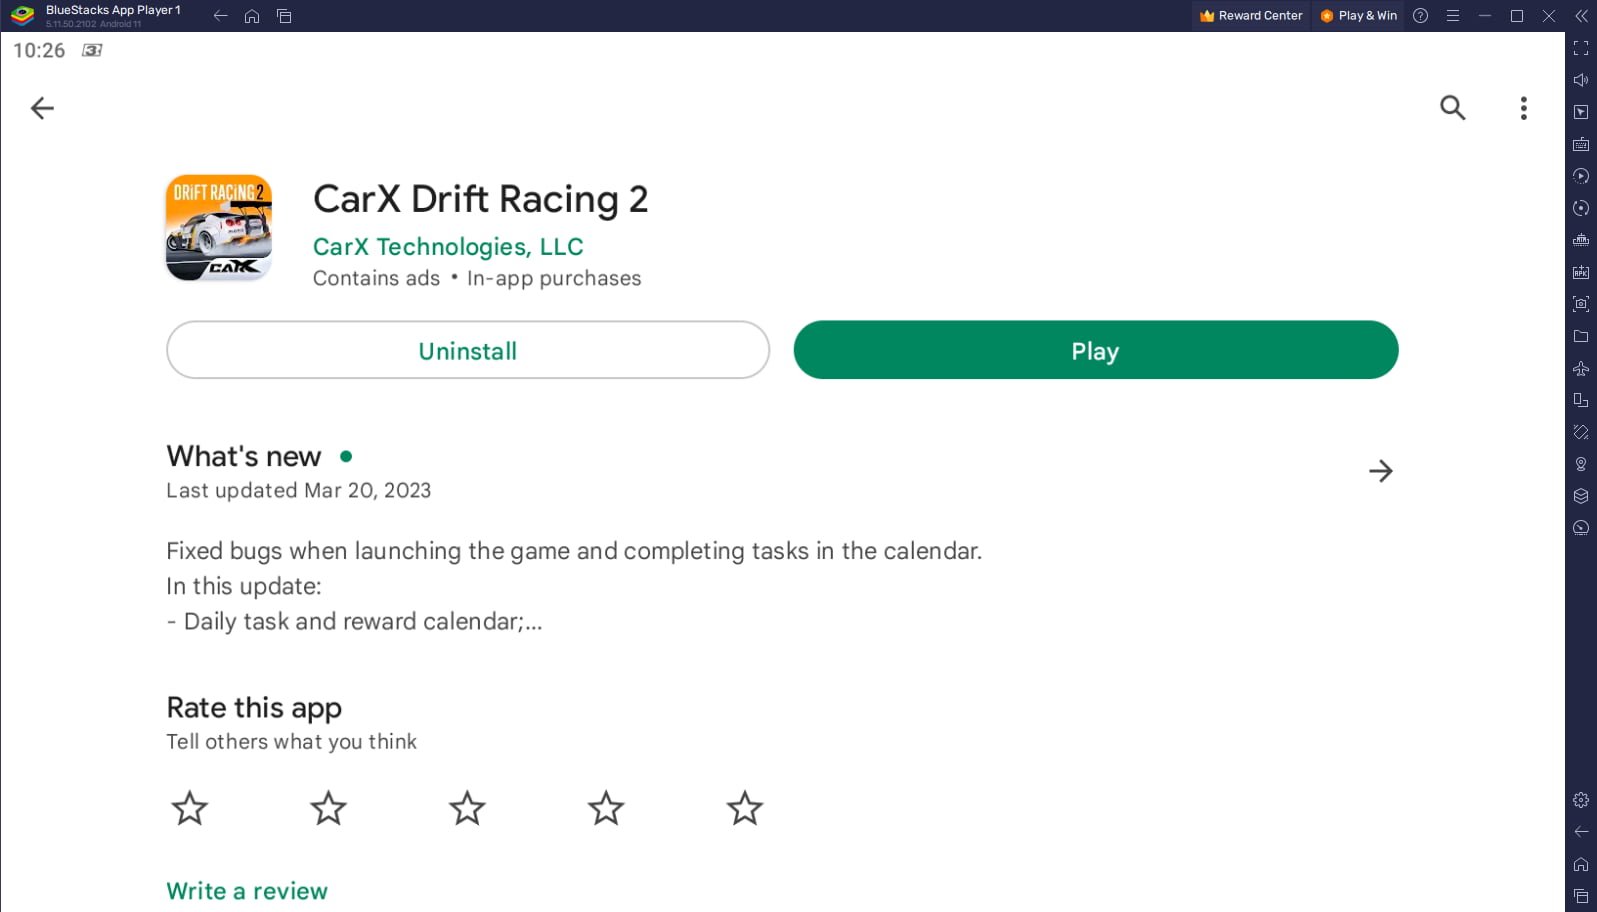
Open your Play Store and log in with your Google account. Search for CarX Drift Racing 2 and download the game to your BlueStacks emulator. This might take a few minutes to complete depending on your network connection.
Download CarX Drift Racing 2 from the Google Play Store
BlueStacks Controller Settings
While downloading the game, take a moment to review your emulator settings. Click the gear icon to access these options. In the Gamepad section, enable "Gamepad detection" for BlueStacks to recognize and accept input from your controller.
Below, set the "Gamepad input settings" to "Automatic" and adjust the "Gamepad vibration" option based on your personal preference, though it may not impact CarX Drift Racing 2.
Once you've connected your controller or gamepad, BlueStacks will recognize it as an alternative input method to your keyboard and mouse, enhancing your gaming experience.
BlueStacks Gamepad Settings
Optimize BlueStacks Performance Settings
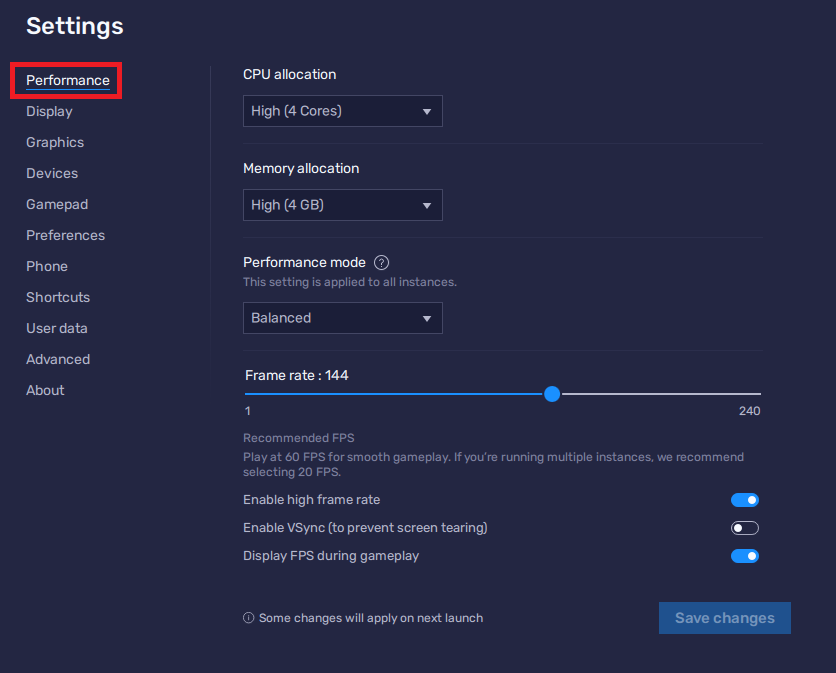
In the Performance tab, adjust the settings based on your PC's capabilities. Allocate a high number of CPU cores if you have minimal background applications running. Similarly, consider your Memory allocation; for users with 4GB or less RAM, set this option to Low.
Under Performance Mode, select the Balanced option to optimize memory and CPU usage, reducing lag or performance issues.
For an enhanced gaming experience, enable the High FPS option and match the emulator's frame rate to your screen's refresh rate, ensuring smooth gameplay.
BlueStacks Settings > Performance
BlueStacks Display Settings
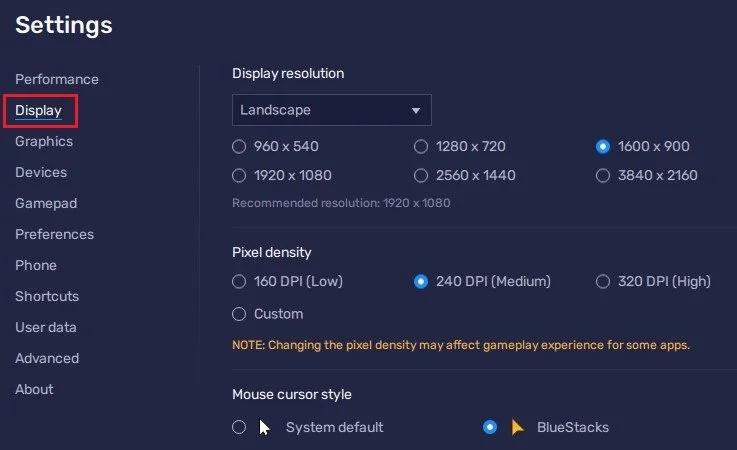
In your Display settings, set the display orientation to landscape, and choose a proper resolution to play CarX Drift Racing 2 on your monitor. You can also adjust the size of this window by dragging its corners.
BlueStacks Settings > Display
CarX Drift Racing 2: Optimal Controls and Settings for a Seamless Experience
Controller Settings
To begin, open your in-game settings in CarX Drift Racing 2. Under the Controls section, select Set Controls to view the current layout for the game.
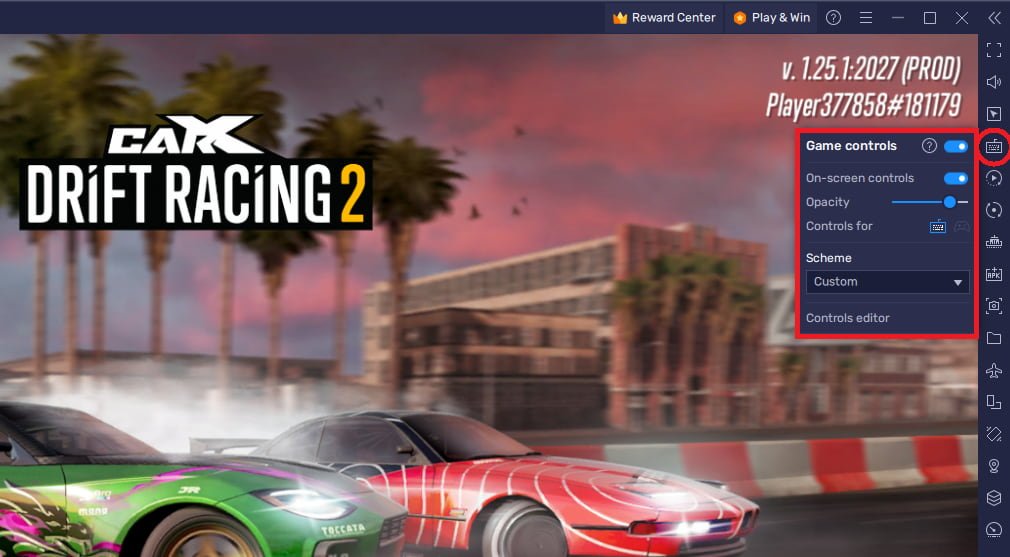
Next, click the keyboard icon in the BlueStacks menu bar. Ensure the Game Controls option is enabled and access the Controls Editor.
CarX Drift Racing 2 Game Controls > On-Screen Controls
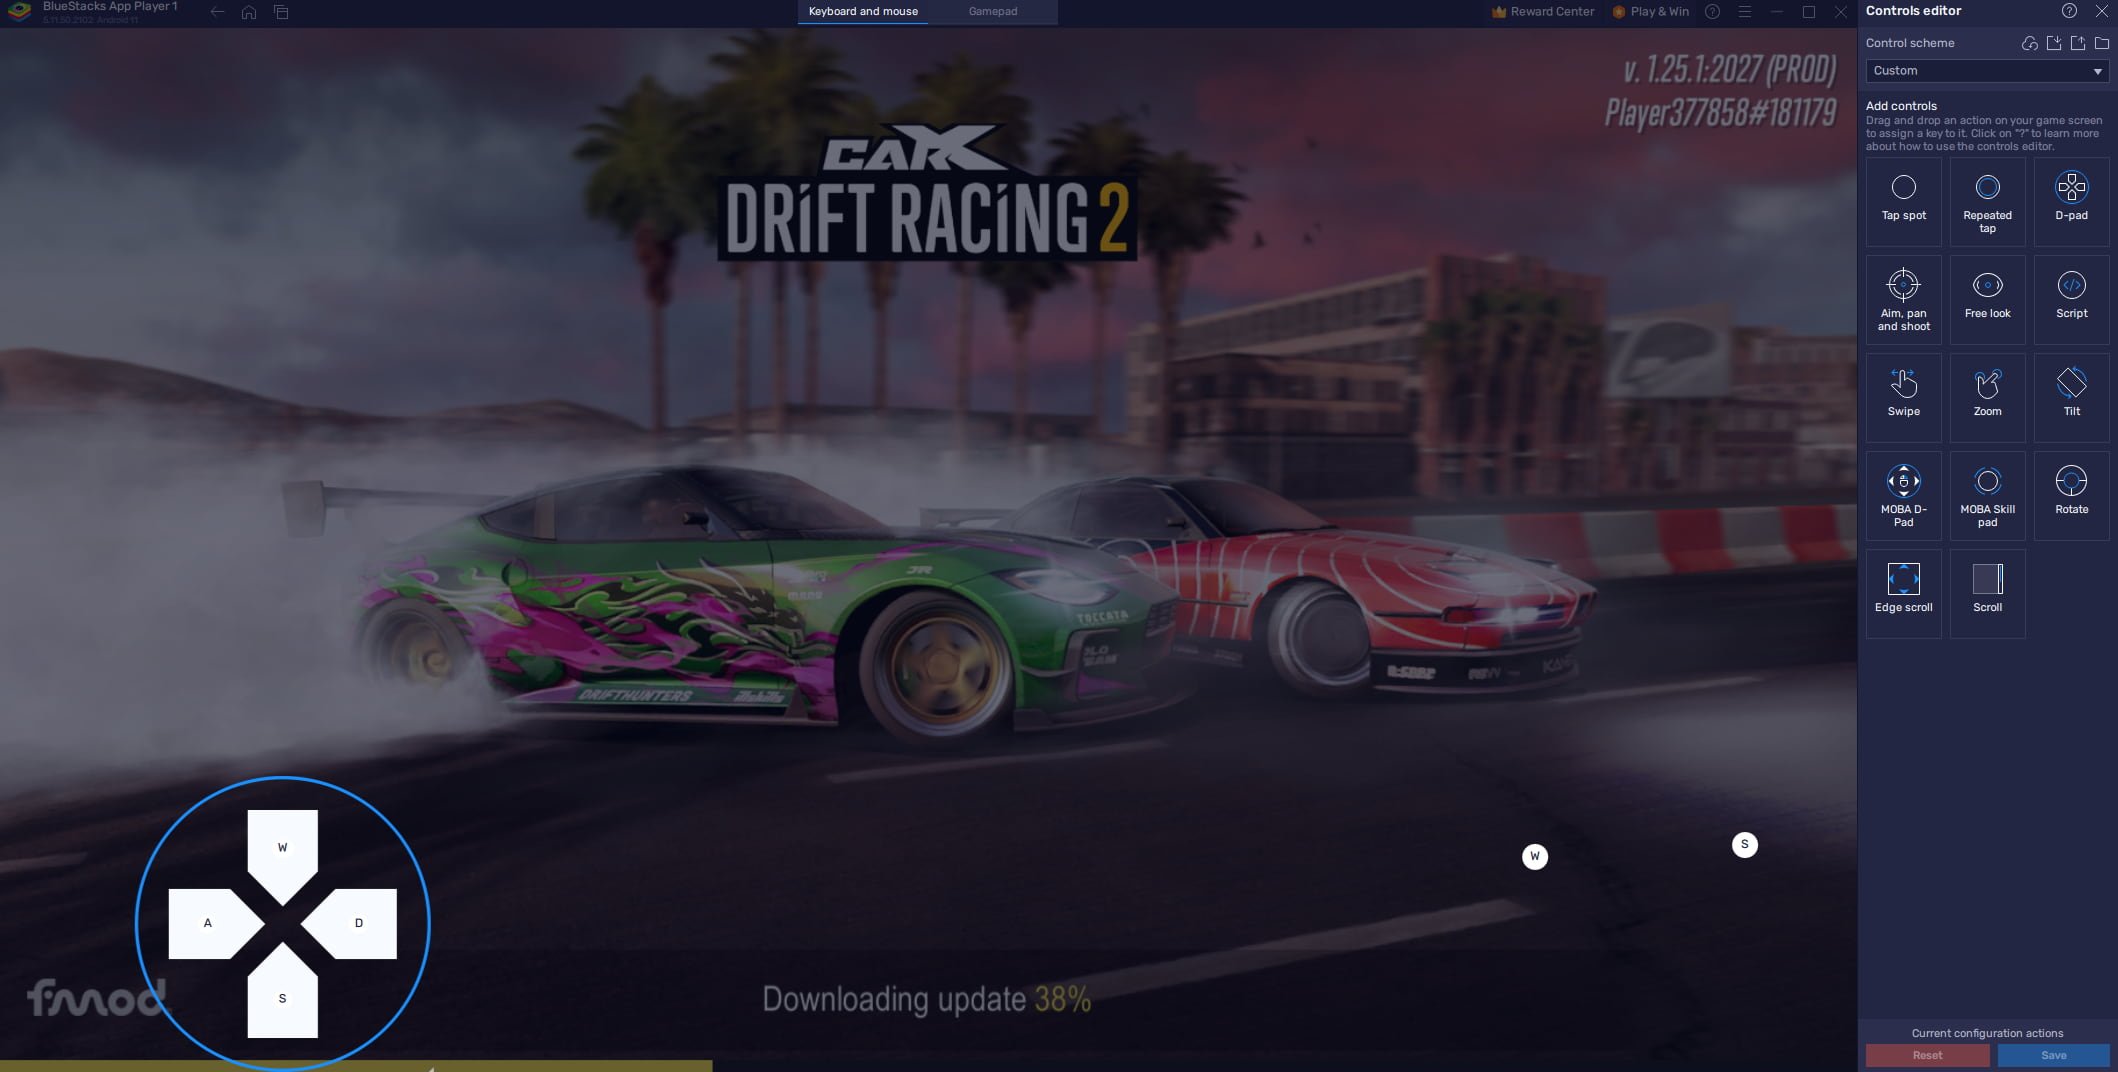
Customize your controls by adding a D-pad on the left side for steering using your keyboard or controller. Feel free to adjust the size and buttons of your D-pad or other controls as needed.
After making adjustments, save your changes and enable the "On-Screen controls" option to preview the controller button layout. Adjust the opacity as needed for better visibility.
CarX Drift Racing 2 Controls Editor
CarX Drift Racing 2 Graphics Settings for BlueStacks
Now, refine the sensitivity and other control settings in the controls menu to suit your preferences. It's advisable to keep Adaptive Quality enabled to automatically adjust settings if your PC encounters lag or low frame rates. However, you can disable Motion Blur, reduce smoke intensity and opacity, and limit the frame rate in "No Limit" mode to help BlueStacks run the game at the emulator's frame rate. If performance issues persist, try running the game at 30 FPS.
CarX Drift Racing 2 Controller Layout
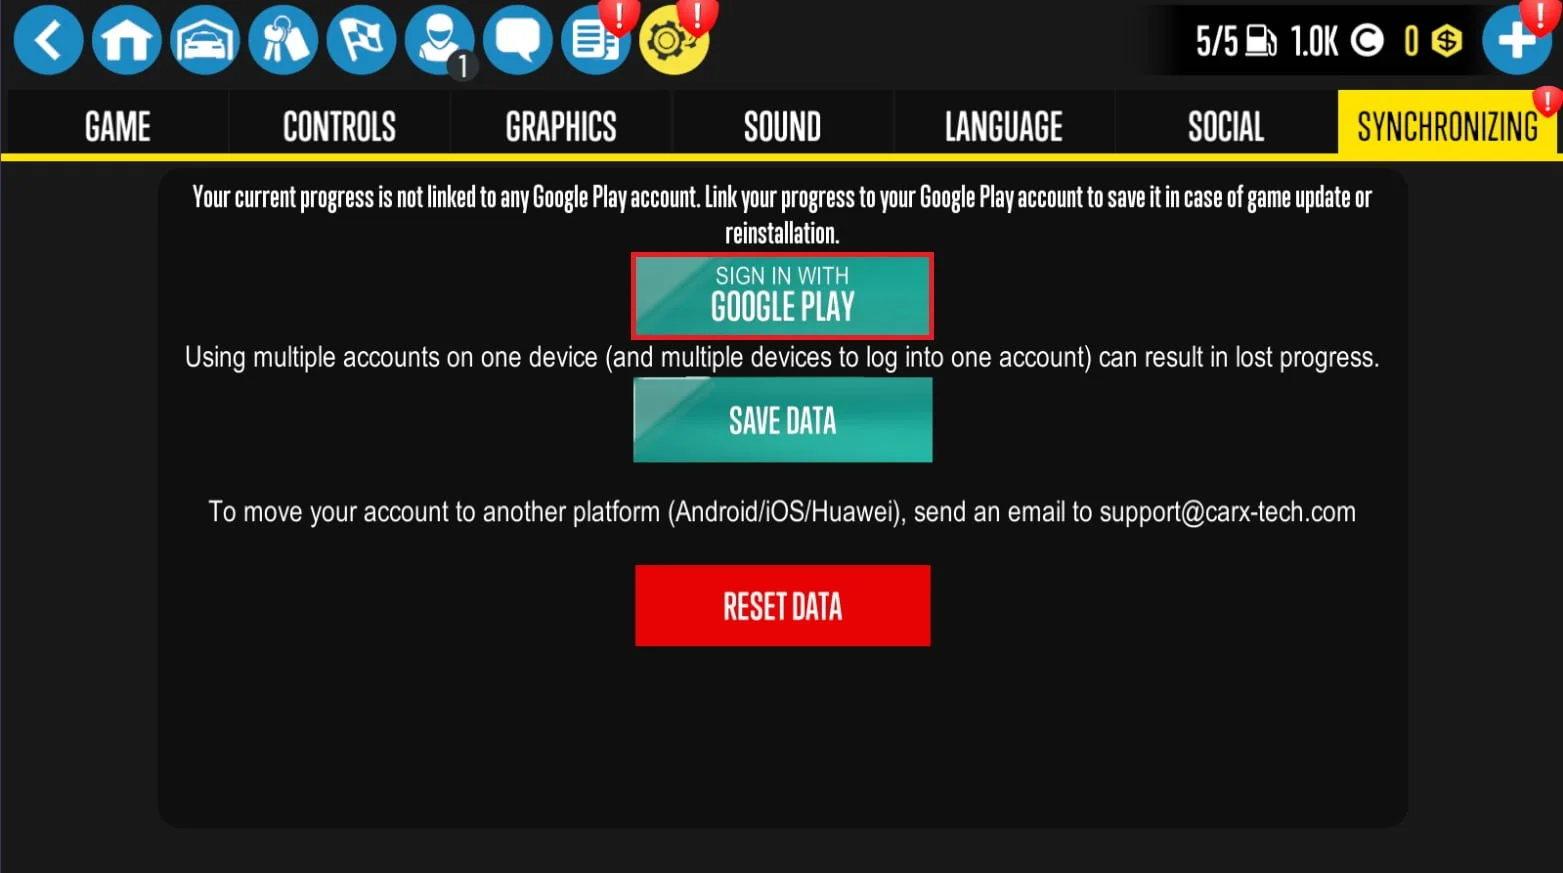
To sync your progress from your mobile device, navigate to the Synchronizing section in the settings and sign in with your Google Play account.
CarX Drift Racing 2 Settings > Synchronizing
-
Access the in-game settings, select Set Controls, and customize your controls using the BlueStacks Controls Editor. Adjust the size and buttons of your D-pad or other controls as needed, save your changes, and enable the "On-Screen controls" option to preview the layout.
-
Keep Adaptive Quality enabled, disable Motion Blur, reduce smoke intensity and opacity, and limit the frame rate in "No Limit" mode. If performance issues persist, try running the game at 30 FPS.
-
Yes, navigate to the Synchronizing section in the settings and sign in with your Google Play account to sync your progress.
-
After making adjustments to your controls and saving your changes, enable the "On-Screen controls" option and change the opacity as needed for better visibility.
-
Yes, you can customize your controls to work with a controller using the BlueStacks Controls Editor. Adjust the size and buttons of your D-pad or other controls as needed to match your controller's layout.


