How To Fix “Sorry You Have Been Blocked” Error - ChatGPT
Introduction
Welcome to this informative guide on resolving the "Sorry, you have been blocked" error message on ChatGPT. Whether you're using a PC or mobile device, we understand how frustrating this error can be. As a tool designed for seamless conversation and creative assistance, ChatGPT aims to provide an uninterrupted user experience. However, on occasion, you may come across this error, often due to reasons such as the use of a VPN, browser-related issues, or stored site data.
In this tutorial, we'll walk you through the steps to troubleshoot this problem, starting from disabling your VPN to managing browser extensions. We'll also touch on how to clear OpenAI site data and cookies from your browser, which is one of the most common fixes for this issue. For those in regions where ChatGPT might be blocked, we'll provide insights on how to navigate this with the strategic use of VPNs. So, let's dive into this guide and ensure you enjoy a smooth, error-free ChatGPT experience.
Disable Your VPN Connection
One of the common culprits behind the "Sorry, you have been blocked" error on ChatGPT is a VPN connection that hides your actual location. Here's how you can swiftly disable it and potentially resolve the issue:
Open your Windows Settings by pressing the Windows key + I simultaneously.
Find and select the 'Network & Internet' option.
In the subsequent menu, locate 'VPN'.
If your VPN is active, you'll see it listed here. Go ahead and turn it off.
By following these straightforward steps, you've effectively disabled your VPN connection, which can often rectify the ChatGPT error. Remember, VPN can interfere with the normal functioning of certain sites, including OpenAI's ChatGPT.
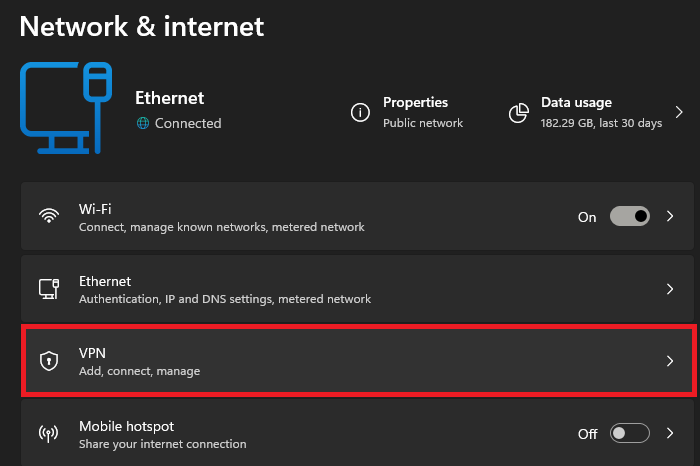
Windows Settings > Network & Internet
Clear the OpenAi Site Data
Another effective strategy for resolving the "Sorry, you have been blocked" error on ChatGPT involves clearing the OpenAI site data stored in your browser. For this example, we'll use Google Chrome:
Open Google Chrome and click on the three-dot icon located in the top-right corner to access the browser settings.
Navigate to the 'Privacy and Security' section.
Select 'Site Settings' followed by 'Cookies and Site Data'.
From here, click on “See all cookies and site data”.
In the search bar that appears, type in 'OpenAi.com'.
Once the OpenAI data appears, click 'Remove All' to delete all cookies and site data related to OpenAI.
After clearing the data, refresh the page and log back into your account. This process should effectively address the ChatGPT error for a significant number of users by refreshing your browser's stored information about the site.
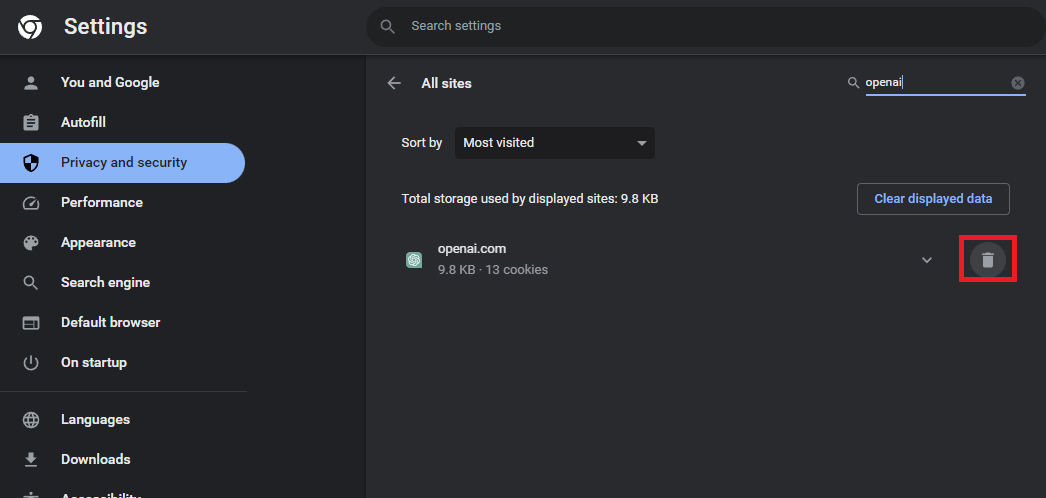
Chrome Settings > Privacy and Security
Disable Browser Extensions and Addons
If the "Sorry, you have been blocked" error continues to appear even after disabling your VPN and clearing OpenAI site data, it's time to look at your browser extensions. They can sometimes cause conflicts or alter your network connection, which might trigger this issue on ChatGPT. Here's how you can disable them:
Locate the icon for each extension on your browser toolbar and right-click on it.
Select the “Manage Extensions” option from the dropdown menu.
You'll be redirected to a new page listing all your installed extensions. Here, toggle off each extension to disable it.
After disabling all extensions, reload the OpenAI page and try accessing ChatGPT again.
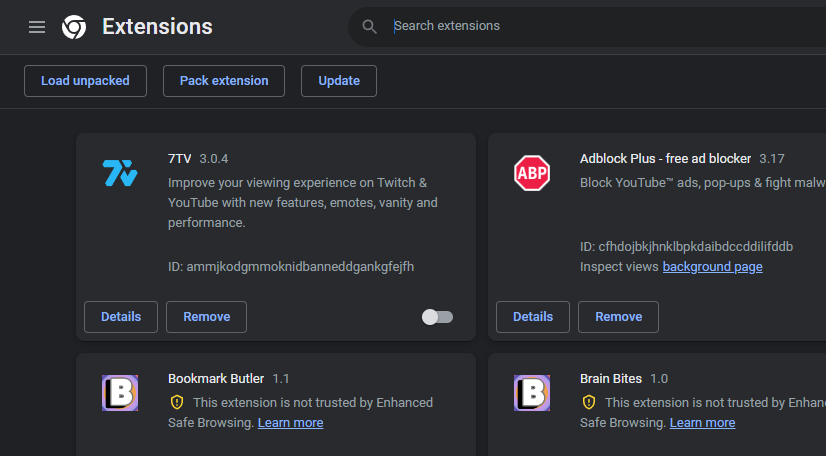
Manage Extensions > Disable Extensions
Use a Free VPN to Access ChatGPT
If ChatGPT is blocked in your region or on a specific network, such as a school or office network, a reliable VPN can be your best solution. Our partner, PrivadoVPN, offers secure and fast VPN services that can help bypass such restrictions while maintaining your online privacy. Check out PrivadoVPN today for a seamless ChatGPT experience.
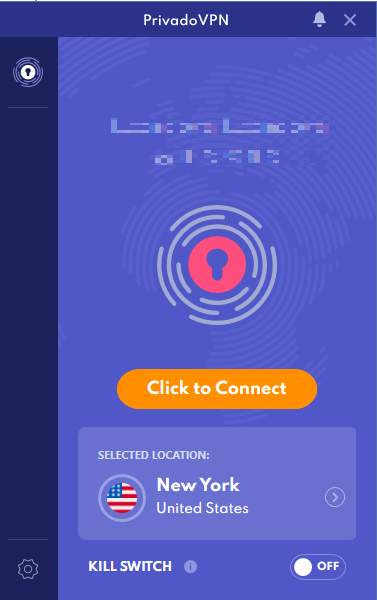
Use PrivadoVPN to access ChatGPT without errors
-
This error usually appears due to a VPN connection masking your location, stored site data on your browser related to OpenAI, or browser-related issues, such as extensions.
-
You can fix this error by disabling your VPN connection, clearing OpenAI site data from your browser, or disabling your browser extensions. If ChatGPT is blocked in your region or network, you might need to use a reliable VPN.
-
You can disable your VPN connection through your Windows settings. Navigate to Network & Internet, select VPN, and ensure it's disabled.
-
In your browser settings, go to the Privacy and Security section, select Site Settings, Cookies, and Site Data. Click on “See all site data and permissions,” search for OpenAi.com and delete the site data and cookies.
-
If the error persists, consider disabling your browser extensions, especially ones that could alter your network connection or interact with ChatGPT. If ChatGPT is blocked in your region or network, using a VPN like PrivadoVPN can help.