

How To Set Up Headphones & Microphone on Windows 11

Setting up headphones and a microphone on your Windows 11 computer is essential for clear audio and seamless communication. However, it can be a daunting task, especially for new users. In this article, we will guide you through the process of setting up headphones and a microphone on your Windows 11 computer. We will provide you with easy-to-follow steps, tips, and tricks that will help you achieve the best audio experience. Whether you're a gamer, content creator, or just need to communicate online, this guide is for you. So, let's dive in and learn how to set up your headphones and microphone on Windows 11.
Adjust your Windows Sound Settings
Open up your Windows Settings. Under System, click on Sound.

Windows Settings > System > Sound
You have the option to select the correct Output and Input device. You can change some additional settings and preview information when clicking on the device name.
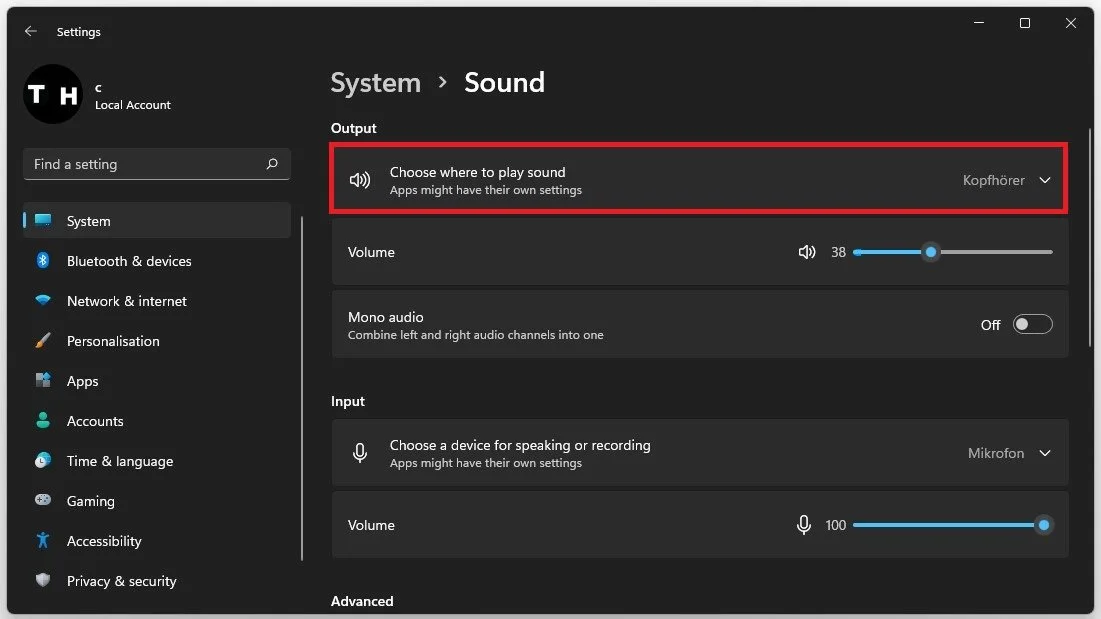
System Settings > Sound > Choose where to play sound
Change and test your preferred Output Format. In most cases, you will want to use the 2 channel 48’000 Hz or 44’100 Hz option. Below, change the output or input volume for your device.
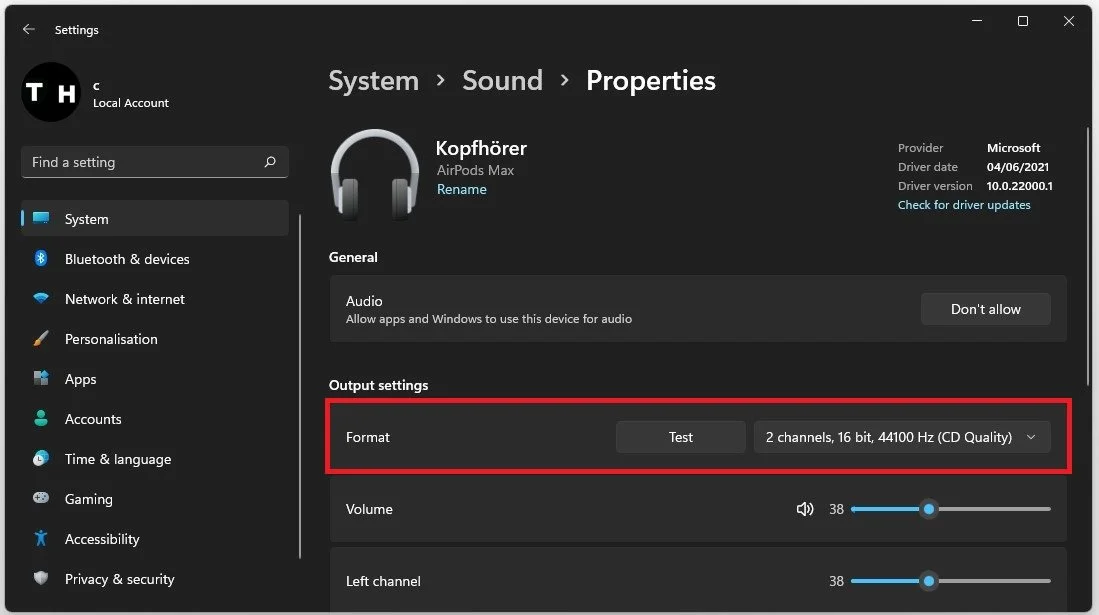
Sound Settings > Sound Device Properties
Depending on which Windows 11 version you currently use and if your device supports it, you can change additional settings, like enabling the Enhance audio option. I prefer to disable this option when using high-end audio devices, but this will come down to personal preference.
When clicking Advanced, your Sound Control Panel will open up, where you can change each Audio Enhancement. We will come back to this window in the next step. With the correct drivers, you can also use Spatial Sound on Windows 11.
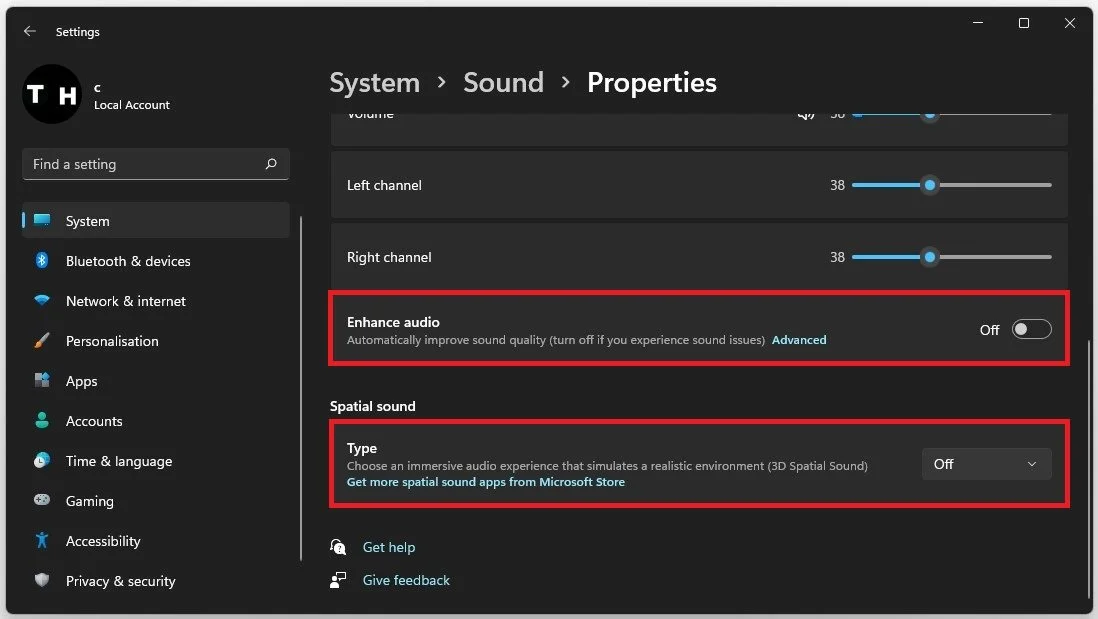
System Settings > Sound > Properties
Allow Sound Devices on your Windows PC
If your headphones or microphone is not in the list, navigate back to your Sound settings and select All sound devices.
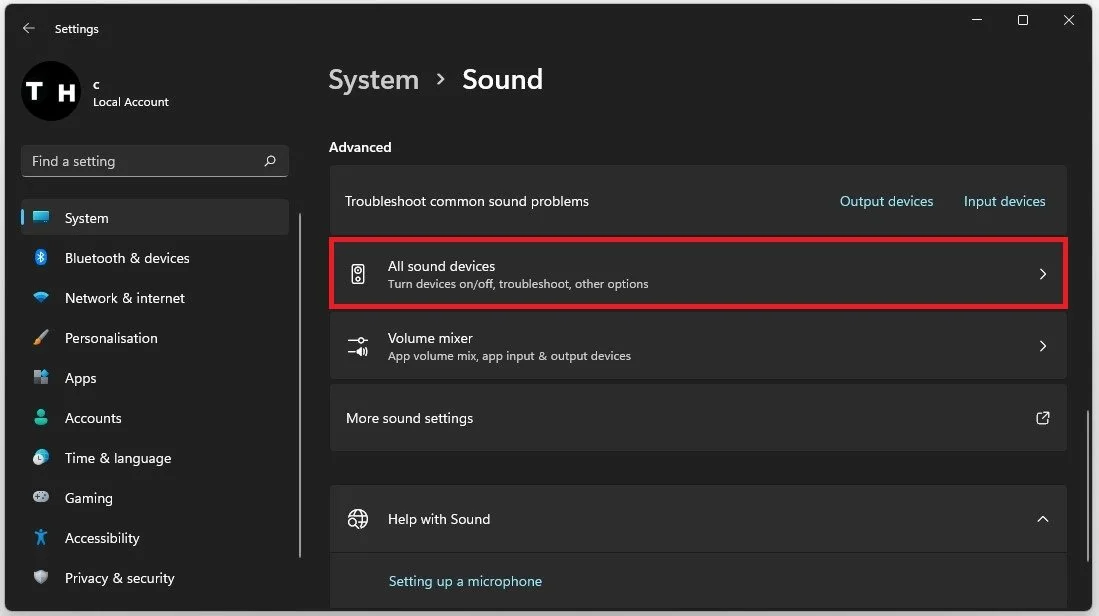
System Settings > Sound > All sound devices
You can see a list of all sound devices that are enabled, connected, disabled or previously connected via bluetooth for example. If your device is showing up in this list, then select it and make sure to click on Allow. This will allow Windows to use the device and add it to your output or input device list from before. All of the other settings will also be available from here.
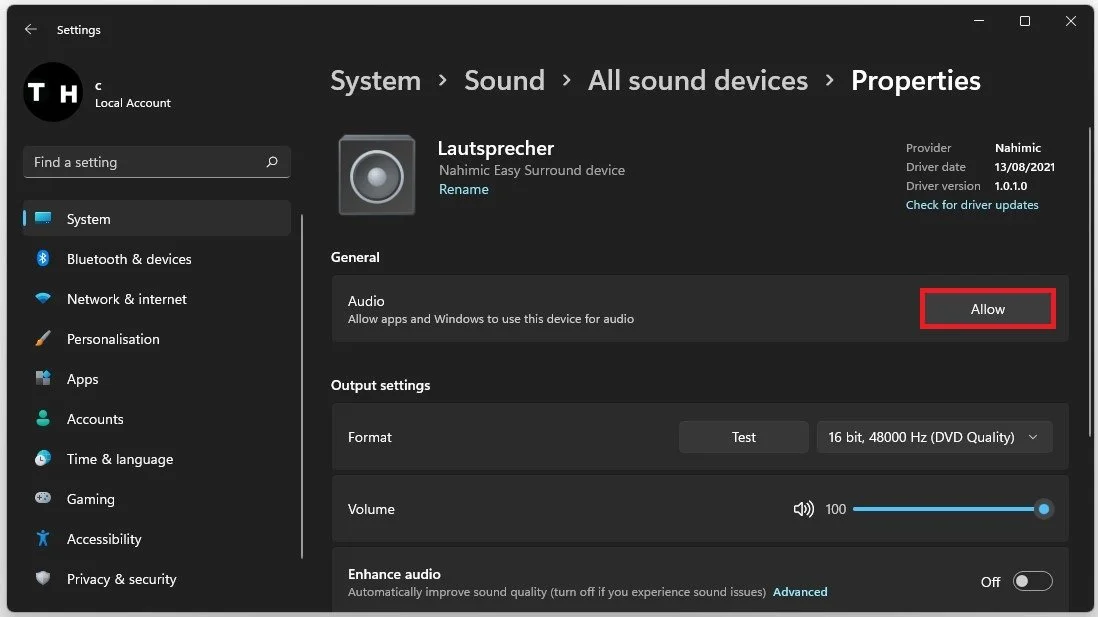
System Settings > Sound > All Sound Devices > Properties
Update the Audio Device Driver
To ensure your device is working properly on your Windows PC, you should make sure that your device driver is up to date. Navigate to More sound settings to open up your Sound Control Panel.
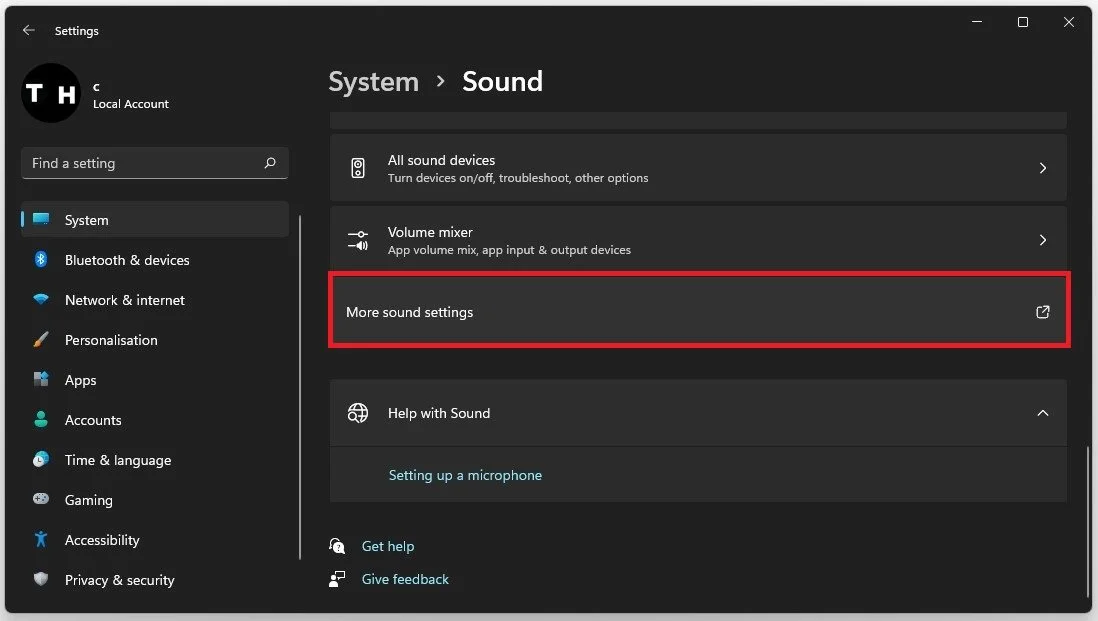
System Settings > Sound > More Sound Settings
Right-click your audio device and select Properties. On the window, click on Properties in your General section. In the Driver tab of this window, select Update Driver. If this option is greyed out, the device’s driver should be current.
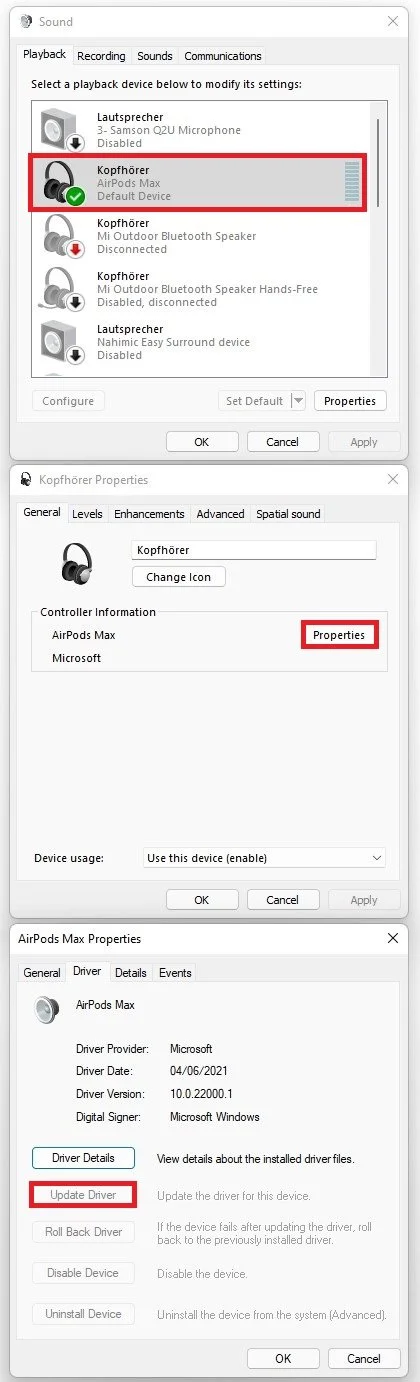
Update the audio device driver
Windows Operating System Update
Your current window version could also be the culprit of connection and sound issues. In your settings window, navigate to the Windows Update tab. Here, make sure that Windows is up to date. If this is not the case, select install the new update requiring you to restart your PC.

Windows Settings > Windows Update
Add a New Audio Device
In the Bluetooth & Devices section, click on Add Device.
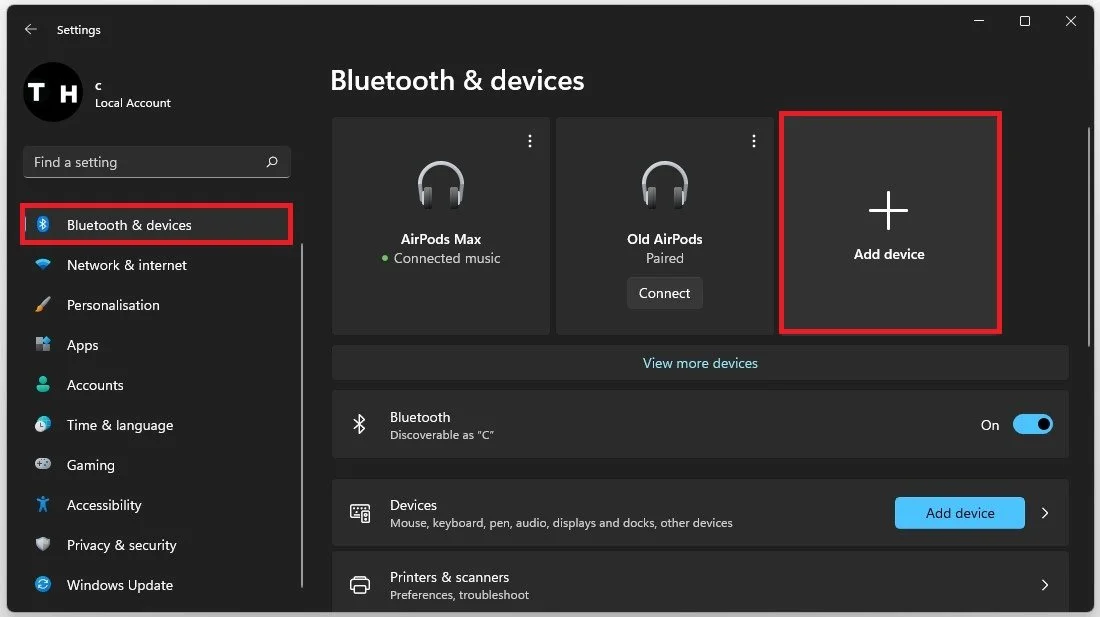
Bluetooth & Devices > Add Device
Ensure Bluetooth is enabled when trying to connect a Bluetooth device. Select which kind of device to add and you will be presented with a list of potential devices that are not yet connected to your Windows PC. Some devices require you to allow a connection or to initiate a pairing mode, such as Bluetooth headphones.

Add a new audio device
Troubleshoot Faulty Hardware
After taking a look at your windows settings, ensure your hardware is not faulty by trying to use it on another PC, or by retrying to connect through another port.
3rd Party Audio Software
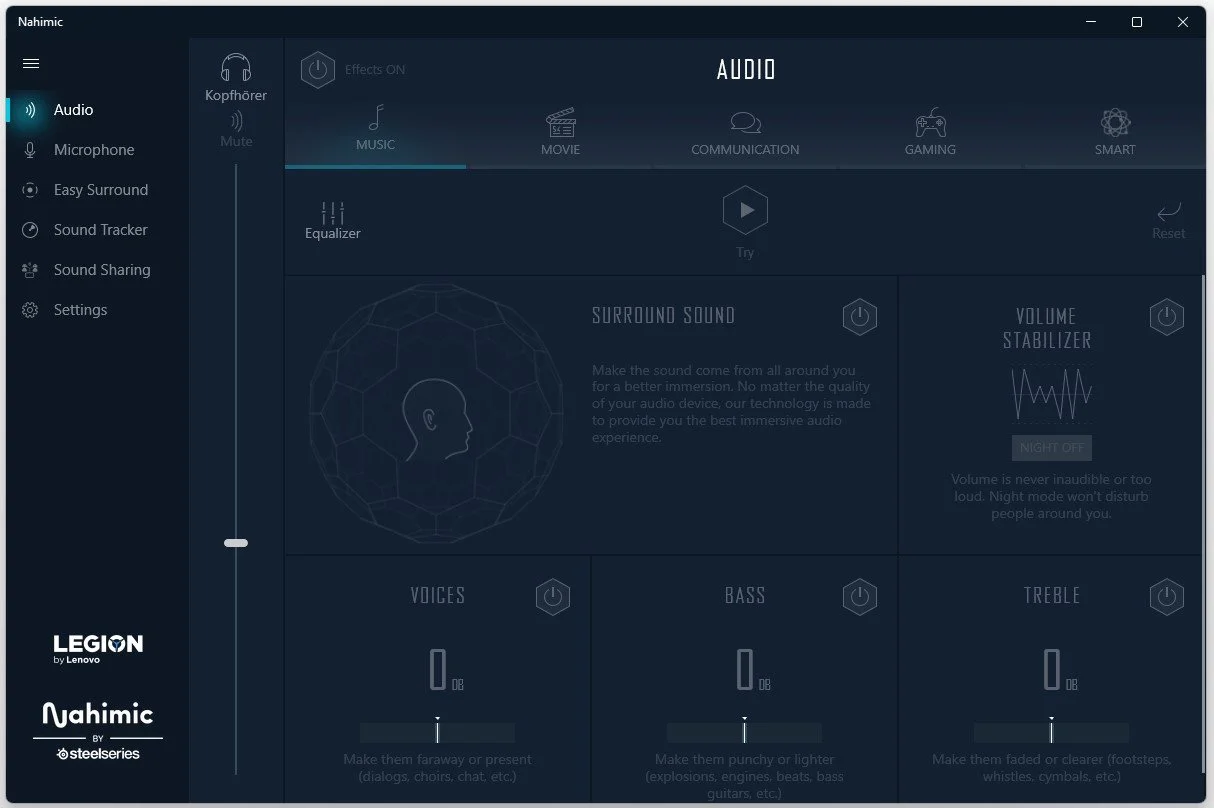
Some PC’s also come with 3rd party audio software, such as Lenovo PCs. In this case, that would be the Nahimic application. Open it up by searching for the app in your start menu search. This application will automatically open up when connecting a new audio device, and it will ask you which device you just plugged in to optimize its settings and effects. I prefer to completely disable all added effects in the Audio section of this application. The same goes for my Microphone.
-
If your headphones and microphone are plug-and-play, you don't need to install any drivers. However, if your devices require drivers, you can download them from the manufacturer's website.
-
To test your headphones and mic, navigate to your Windows settings, and in the Sound section, select your microphone or headphone and click on Test.
-
If your headphones or microphone is not working, check the connections, make sure the devices are enabled in the sound settings, and update the drivers. If the problem persists, try restarting your computer.


