

The Best Webcam Settings For OBS Studio & How To Add And Crop The Webcam Video Feed

Are you tired of grainy, poorly lit webcam footage during your live streams or recordings? Look no further than OBS Studio! With its advanced settings and customizable options, OBS Studio can help you achieve the highest quality webcam footage possible. But where do you start? In this article, we will guide you through the best webcam settings for OBS Studio, including how to add and crop the webcam video feed to make your videos look more professional and engaging. Whether you're a seasoned streamer or just starting out, these tips will take your webcam game to the next level.
Adjust the OBS Video Capture Device Settings
Select to add a Video Capture Device as a new source in OBS Studio; you can name it whatever you want. Set the Resolution / FPS type to Custom. You will now be able to use a different resolution, and some other options will show up. Layer it above your game or display capture to see the video output.

OBS Sources > VIdeo Capture Device > Settings > Resolution / FPS Type
Adjust the Webcam Settings and Crop in OBS
When selecting the window, you can move it around and resize it by selecting a corner and dragging it.
If you hold shift by dragging a corner, the capture device will resize but keep its scaling
Use CTRL & F to set it to fullscreen
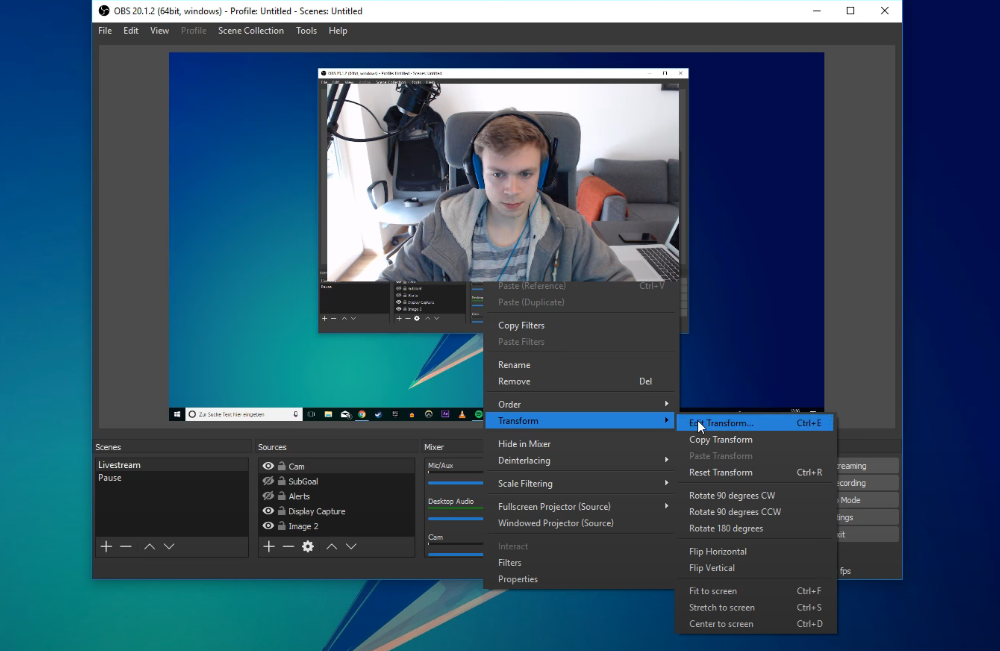
Select the window, right-click it, and navigate to Transform, Edit Transform …
This will enable you to change the crop settings, positional alignment, bounding box type, etc.
Reset the transformation with CTRL & R. Manually rescale your webcam feed by dragging a side while holding the alt key
Transform the webcam source in OBS Studio


