How To Lock Chats on WhatsApp with Face ID - Tutorial
Introduction
Ensuring the privacy of your WhatsApp messages just got easier with the introduction of Face ID lock for individual chats on iPhone. This guide will take you through the simple steps to add that extra layer of security to your sensitive conversations. Learn how to safeguard your chats with Face ID, ensuring that your private messages remain just that—private.
Ensure WhatsApp is Up-to-Date for Enhanced Privacy
Update WhatsApp:
Open the Apple App Store.
Search for "WhatsApp."
Tap "Update" if an option is available.
Keeping WhatsApp updated is crucial for accessing new features like chat lock with Face ID, designed to enhance your messaging privacy
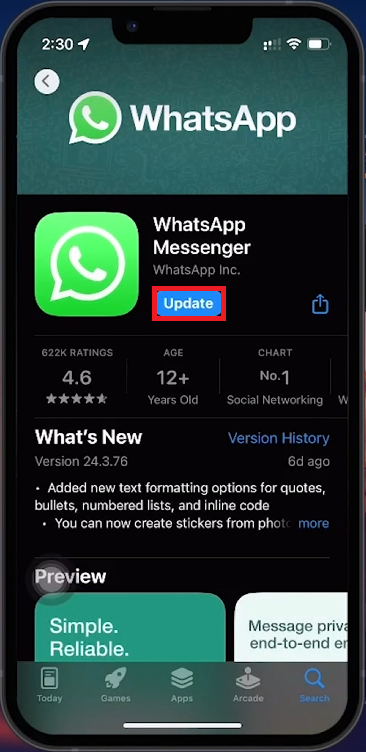
App Store > WhatsApp > Update
Activate Chat Lock Using Face ID on WhatsApp
Open WhatsApp:
Ensure WhatsApp is updated on your iPhone.
Open the app and go to the conversation you wish to secure.
Select the Chat:
Tap the contact's name at the top to access their info page.
Lock the Chat:
Scroll to find and toggle on the "Lock Chat" option.
WhatsApp will prompt for Face ID verification.
A successful scan locks the chat, confirmed by a green toggle.
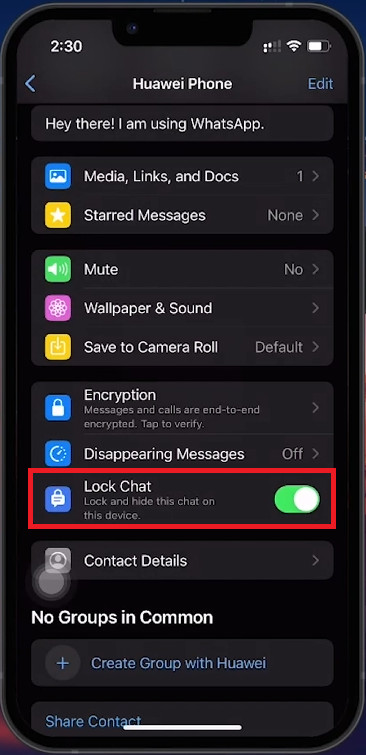
WhatsApp Chat > Options > Lock Chat
Accessing Locked Chats
View Locked Chats:
Locked conversations are hidden from the main chat screen for added privacy.
Swipe down from the chat list to reveal the "Locked Chats" section.
Authenticate with Face ID:
Use Face ID to access and engage with these secured chats as normal, maintaining the confidentiality of your exchanges.
This process provides a straightforward method to safeguard specific WhatsApp conversations behind Face ID authentication.
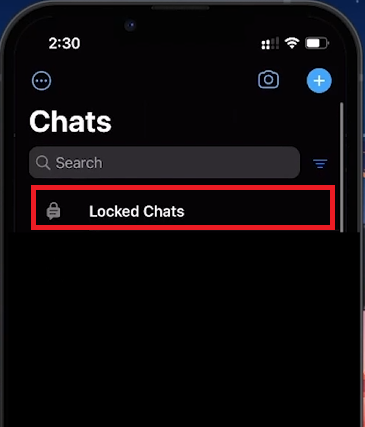
Locked WhatsApp Chats
By following these steps, you can enhance the privacy of your WhatsApp messages, ensuring that only you can access your most sensitive conversations.
-
Yes, you can secure individual chats with Face ID on WhatsApp for iPhone. This feature enhances privacy by requiring Face ID verification to access locked conversations.
-
To update WhatsApp, visit the Apple App Store, search for WhatsApp, and install any available updates. The lock chat feature requires the latest version of the app.
-
Open WhatsApp, select the chat you want to lock, tap the contact's name to open their info page, and scroll down to toggle on "Lock Chat." Face ID verification will then be required to lock the chat.
-
No, locked chats are hidden from the main chat list. To access them, pull down from the top of the chat list to find the "Locked Chats" section, which requires Face ID authentication.
-
Ensure your WhatsApp and iOS are both updated to the latest version. If issues persist, restart your iPhone and try setting up the Face ID lock feature again.